Module 2: How To Use Librarian
This automated content management function makes it easy to add a Resources section to end of your Guidebook to hold an Appendix.
Step One: PREPARE

Open the Facilitator Guide or Participant Guide that needs an Appendix.
Update the Table of Contents
Key points:
The Appendix will be added to end of your current Table of Contents.
A new section will be added, title Resources, and the Appendix will be placed in this section.
Step TWO: Add an Appendix

In the open Guidebook that needs an Appendix, follow these steps …


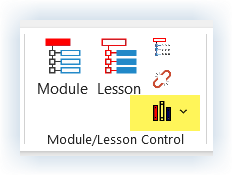
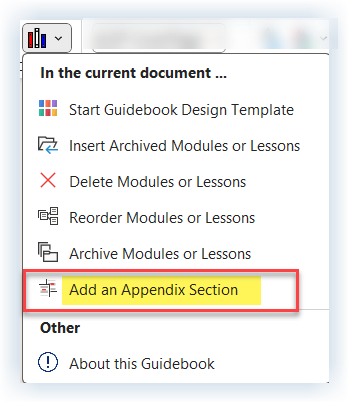
Click Librarian in the Module/Lesson Control group on the LeaderGuide Pro ribbon
Click Add an Appendix Section in the Librarian drop-down menu
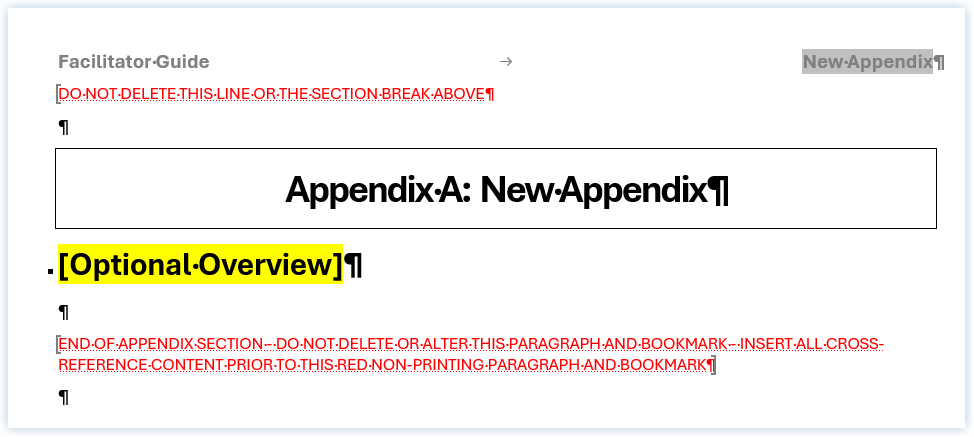
Librarian will add a new Appendix page at the end of your document and take you to the new page
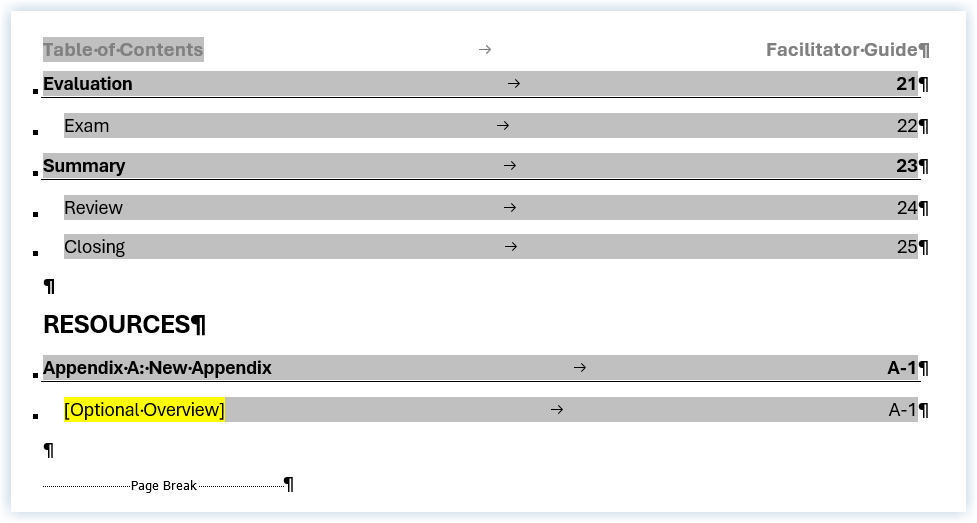
Librarian will also add the new Appendix to your Table of Contents
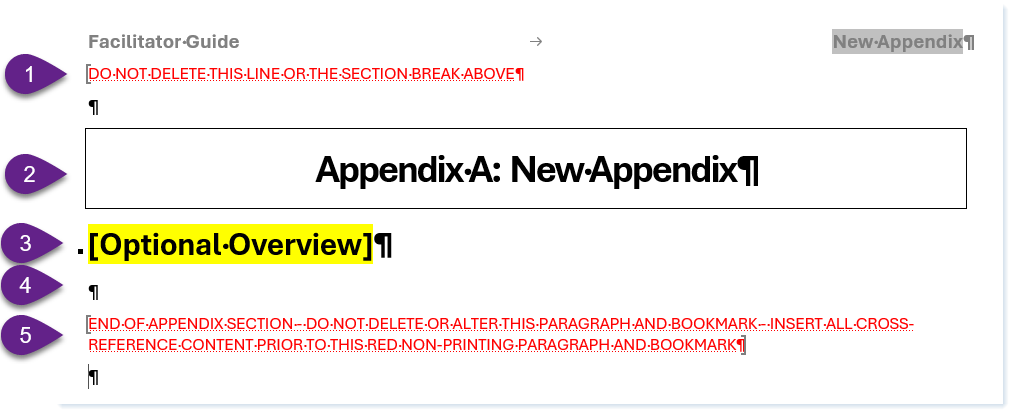
To work in the new Appendix page
Stay away from the non-printing red text. If you work in the document without your paragraph marks on you will not see the red text - because it is non-printing. So please be careful.
To replace the Appendix A: New Appendix text:
You cannot change “Appendix A:”
To change “New Appendix” simply type over it.
Click Update All Fields in the Controls group on the LeaderGuide Pro ribbon to update the Table of Contents
To replace the Optional Overview text and remove the yellow highlighting:
Place your cursor in the highlighted text and type over it.
NOTE : This spot is intended to hold a brief heading that will appear in the Table of Contents indented below the Appendix name.
Start adding your Appendix content at the free paragraph mark below the Optional Overview text.
Do NOT get tangled up in the red text at the end of the page.
Please keep your paragraph marks on so that you will see the red text.
You can also hit Enter a few times at the spot just above the red text to push the red stuff further down the page.
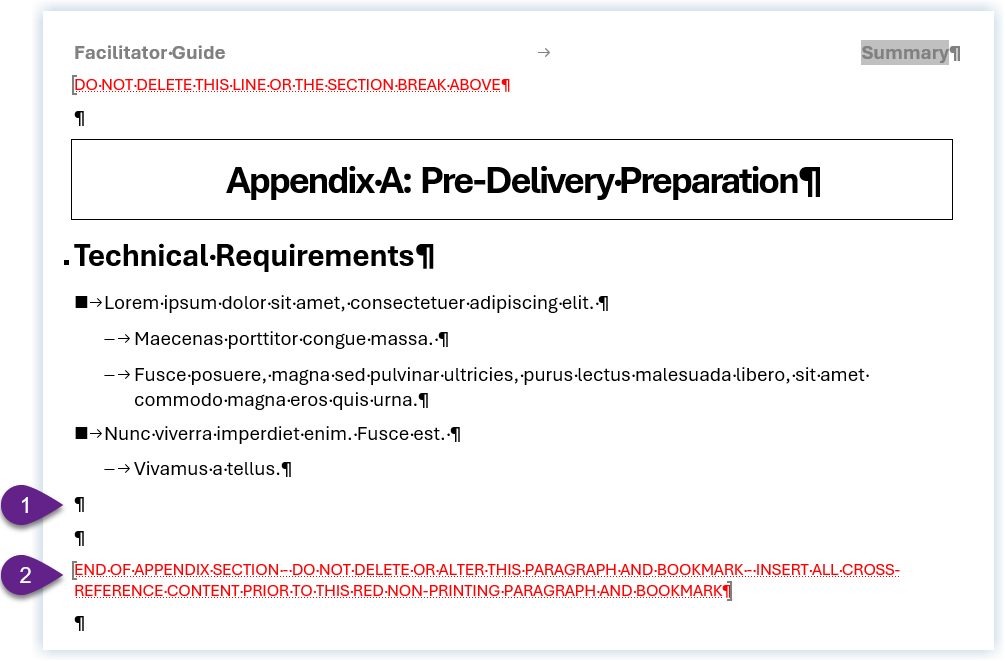
To add another Appendix
Place your cursor at a free paragraph mark below the content for the current Appendix and before the non-printing red text.
Work ABOVE / BEFORE the non-printing red text. If you work in the document without your paragraph marks on you will not see the red text - because it is non-printing. So please turn your paragraph marks on.
Repeat the first two steps on this page.
Click Librarian in the Module/Lesson Control group on the LeaderGuide Pro ribbon.
Click Add an Appendix Section in the Librarian drop-down menu.
-
Click here to learn about a built-in method or saving your LGPro files to Library folders that work well with Librarian.
One-on-One Assistance - Click to Schedule a Support Session
LeaderGuide Pro User Group - Click to Join