
The Components of a Facilitator Guide

LeaderGuide Pro facilitator guides and participant guides are built with Document Parts that:
Structure your documents
Organize your content
Ensure consistency
The Facilitator Guide Document parts include:
A Cover page
An Acknowledgements page
A Table of Contents
A Getting Started Section that includes:
About This Guide
The Program in Perspective
Program Preparation
A Training at a Glance
Modules
Lessons
The Participant Guide Document parts include:
A Cover page
An Acknowledgements page
A Table of Contents
An Overview Module that includes:
A Program in Perspective page
A Learning Objectives page
Modules
Lessons
Facilitator Guide Document Parts - A Closer Look

The Cover Page
The cover page holds two key items:
1. The training program name (the name of the course)
The phrase Program Name is dynamically replaced by the name you add when you are starting a new facilitator guide.
Your program name will appear at the top of the Acknowledgements page and in the even page footers.
You can edit the name as you work in your document. Your edits will dynamically update on the Acknowledgements page and in the footers.
2. Your logo
The Great Circle Learning logo is on the cover as a placeholder.
You can easily customize LeaderGuide Pro to insert your logo.
In the example shown:
Word’s Paragraph Marks are on, so you are seeing Word’s non-printing characters. These do not show in a printed document or in a PDF.
The appearance of the cover page is completely customizable.
You can change the way the cover looks.
You can add images and anything else you need.
The cover should always be only be one page.

The Acknowledgements Page
The Acknowledgements page displays:
Your copyright and revision date information
which repeats in the odd page footers.
Placeholder information Great Circle Learning has included to give you an idea what to place here, and which you can edit or remove.
And any other information you choose to add to this page, such as:
Your corporate legal notices
Your contact information
Important:
There is a section break on this page.
You will not see the section break if you turn Word’s Paragraph Marks off.
Do not delete the section break, because that will negatively impact your headers and footers on the following pages.
The section break helps control the headers and footers.

The Table of Contents (TOC)
The Table of Contents builds automatically for you.
Do not type on this page.
Do not manually alter it.
To update the Table of Contents:
Click the Update All Fields button in the Controls group on the LeaderGuide Pro ribbon.
The TOC will automatically include all of your module and lesson names.
Modules appear as TOC 1
Lessons appear as TOC 2.
To include TOC levels 3 - 9:
Use the Styles drop down menu in the Text/Table Formatting group to add Headings 3 - 9 to the content you want to see reflected in the TOC.
To change the fonts and other attributes of Headings 3 - 9, modify the Heading styles in the Style Guide associated with the Collection in use.
The Getting Started Section
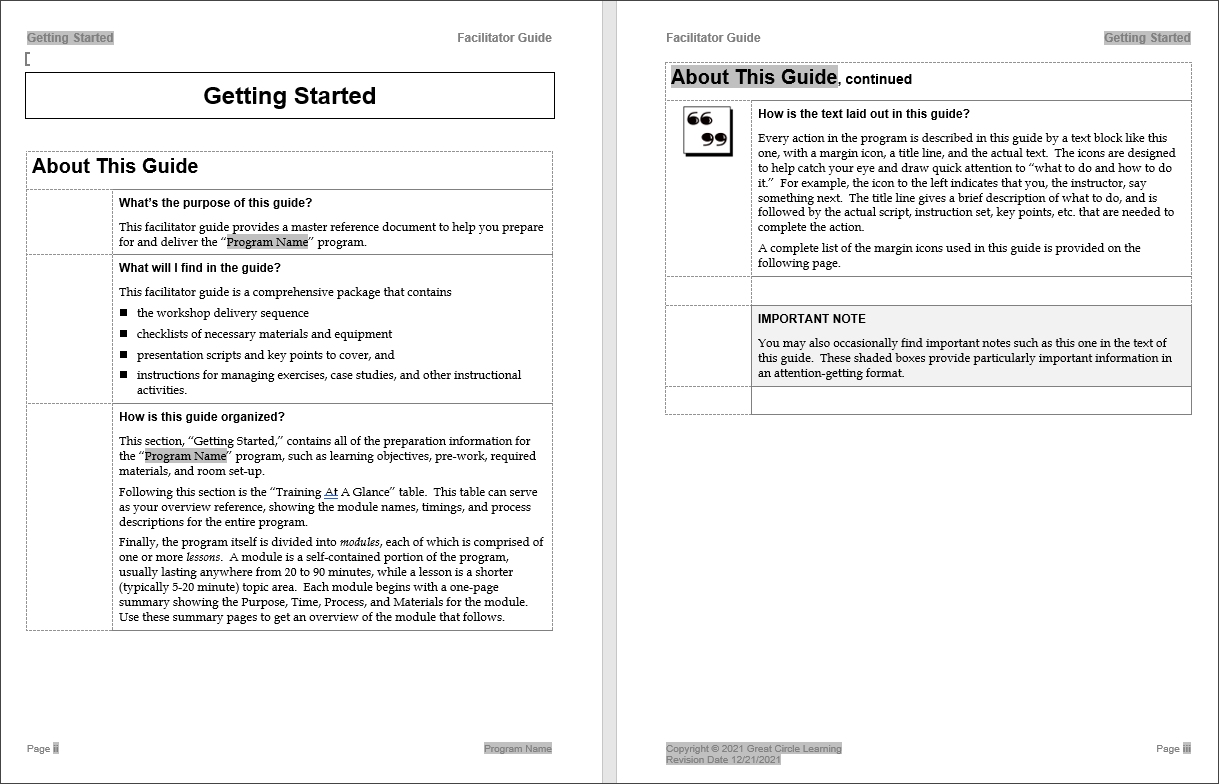
About this Guide
The first two pages of the Getting Started section provide your trainers with basic information about your leader guide.
You can customize these pages when you create a custom collection.
You can also choose to eliminate this section when you create a custom Collection.
Your Program Name repeats in several places in the Getting started section, as indicated by the gray fields.

The Graphic Cues page
The Graphic Cues page shows the icons that may be in use in your facilitator guide.
The icons shown are based on the Collection in use.
The example shown here is from the Elegant Collection.
The extra spaces in the icon grid are placeholders for your 15 extra custom icons, should you choose to add them.
This page is:
Updated by LeaderGuide Pro if you customize your Block and Ribbon icons in a custom Collection.
And it is available as customizable part within your Collection, so that you can set it up to suit your needs.
Any, you have the option to eliminate from your Collection.

The Program in Perspective page
The Program in Perspective page contains placeholders for important information about the specific course you are building, including:
The Program Rationale - why are we running this training?
The Learning Objectives - what will participants be able to do upon completion of this training
The Program Timing - how much time is required to deliver this class
You can click the Update All Fields button on the LeaderGuide Pro ribbon to auto-populate the placeholders for hours and minutes in the Program Timing block after you add Module and Lesson times (as you are building your facilitator guide).
The Minimum/Maximum number of Participants the class is designed for
And any other high-level program information you need to add.
The first two content blocks on this page with icons next to them, the Program Rationale and the Learning Objectives, are set to automatically extract to the Overview section of a Participant Guide if you run an Extract.
The little red Zs in the third and fourth blocks are non-printing characters that relate to LeaderGuide Pro code. They will not show up in printed or PDF versions of your document.

The Program Preparation page
This page contains placeholders for important information about what the instructor must do to prepare to deliver this class, including:
Pre-Work
Required Materials
Room Set Up
Instructor Preparation
And any other preparation information you need to add.
Trainers love the fact that this information is always found in the same place.
You can:
Customize this page.
Allow it to become multiple pages.
Choose not to include it in your custom Collection.
The Training at a Glance

The Training at a Glance (TAG) starts out as a blank page, other than name along the top of the page and the non-printing red text.
Do not type on this page or manually alter it.
To populate this page click the TAG button on the LeaderGuide Pro ribbon.
The information that is added is drawn from your Module Overview pages.
Use Update All Fields to update content on this page if you make changes on a Module page.
The Training at a Glance serves as an advance organizer for the instructor.
For you as the developer:
The TAG helps you ensure that your instructional flow is correct.
Use the Go To navigation on the LeaderGuide Pro ribbon to view your Training At A Glance at any time.
The Training at a Glance marks the end of the Introductory Materials section of your facilitator guide.
You will see non-printing red text and a section break.
Do not delete or alter the red text or the section break because they help control headers and footers and other important functionality.
To eliminate this page, choose EXPRESS when starting a new facilitator guide.
If you are already in a facilitator guide that includes a Training at a Glance and you don't want it, use the LGPro Special Extract function and Extract All into a new EXPRESS facilitator guide.