LeaderGuide Pro creates TWO types of instructional guidebooks.
A Facilitator Guide to serve instructors:
As a study guide and
As an at-a-glance delivery roadmap with clear, concise and complete information and directions.
The Facilitator Guide is the master resource containing everything required to deliver the training.
A Participant Guide to support learners:
With key points, instructional exercises and capture space for notes.
To enhance engagement and retention.
And to serve as a post-training reference resource.
Consistent Instructional Framework
Both guidebooks follow the same instructional framework:
Modules
Made up of Lessons
Built with Content Blocks.
This framework:
Chunks information into manageable pieces.
Makes the training easier to follow and apply.
Standard Guidebook Structure
Facilitator Guide Structure
Every new Facilitator Guide sets up the same way.
Section 1
Cover page
Acknowledgements page
Section 2: Preparation
Table of Contents
Getting Started
About This Guide
Graphic Cues
The Program in Perspective
Program Preparation
Training at a Glance
Section 3: Delivery
Modules
Lessons
Optional Section 4: Appendix
Appendix Content
Participant Guide Structure
Every new Participant Guide sets up the same way.
Section 1
Cover page
Acknowledgements page
Section 2: Overview
Table of Contents
Section 3: Instruction
Overview
Purpose
Learning Objectives
Modules
Lessons
Optional Section 4: Appendix
Appendix Content
Differences between Key Pages
Facilitator Guide - Participant Guide
1. The Table of Contents in a Facilitator Guide includes a Getting Started module and a Training at a Glance. Both of these elements contain information that helps instructors prepare for the delivery.
2. The Table of Contents in a Participant Guide mirrors the Module and Lesson section of the Facilitator Guide. The participants do not need the Getting Started module or the Training at a Glance.
3.Module-Lesson Example - Facilitator Guide. A Module starts with a Module Overview page, followed by one or more Lessons. Every Module contains at least one Lesson.
4.Module-Lesson Example Participant Guide. A Module is a Heading at the start of the first Lesson page. Every Module contains at least one Lesson.
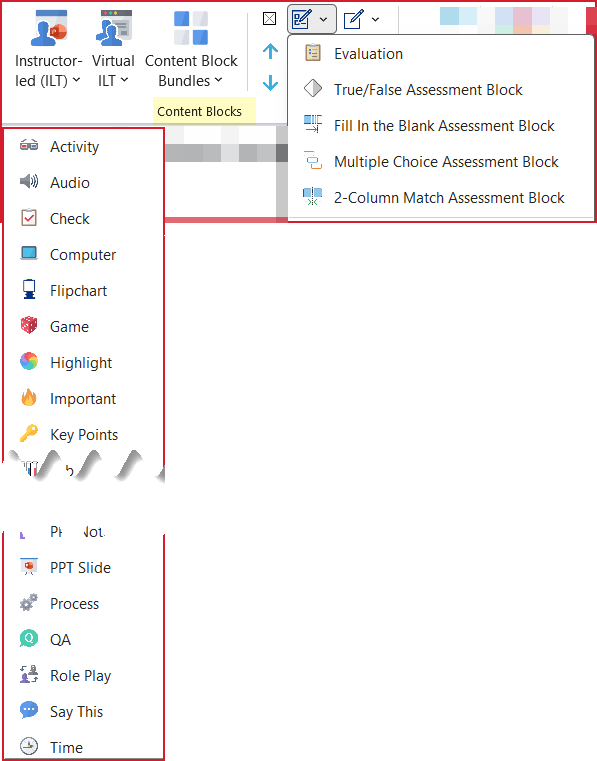
5.Content Block Examples Facilitator Guide. Lesson pages are typically set up as "three column" to include an icon to visually cue trainer actions, a call to action headline followed by specific instructions, and a space for additional instruction notes. Slide images can be added into column one as thumbnails or into column two or three.
6. Content Block Examples Participant Guide. Lesson pages are typically set up as "two column" to include: an icon in cell one and in cell two - a headline followed by key points, or text, or exercise instructions, or capture space for notes. Slide images are typically placed into column two.
What this means for YOU
You will be saving a lot of time and producing more professional training materials.
Select an option below:
Always Do This
When to Use Word
Use LeaderGuide Pro to Do This
Use LeaderGuide Pro to:
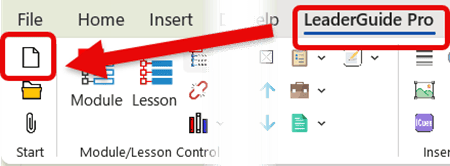
Start a new guidebook - use the New button
Open an existing guidebook - use the Open button
Add Modules and Lessons - use the Module and Lesson buttons
Reorder, Delete or Archive Modules and Lessons - use Librarian
Paste content copied from other sources - use the Paste Special button
Add a Content Block - use the Content Block buttons
Delete/remove a Content Block - use the Delete Table Row button
Add bullets or numbered lists
Use the Bullet>Promote>Demote buttons
And the Number>Promote>Demote>Restart List buttons
Import PowerPoint slides and notes
Import images and chunks of content from other documents
Resize slides and other images
When to use Word vs. LeaderGuide Pro
Use Word to:
Access the LeaderGuide Pro ribbon and use the software
Save the documents you create with LeaderGuide Pro
Print or view the guidebooks in Print Preview mode
Type in or delete text within a Content Block
Copy and paste content copied from within a guidebook
AVOID using these Word functions
Undo and Redo
Undo and Redo only address the last action taken.
And that is usually not enough to actually undo or redo something LeaderGuide Pro has just done for you.
Because most of the time when you click a button on the LeaderGuide Pro ribbon you are kicking off a series steps (that happen so fast that you don't see them).
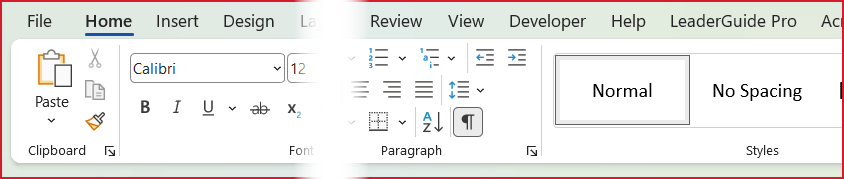
Font, Paragraph and Styles
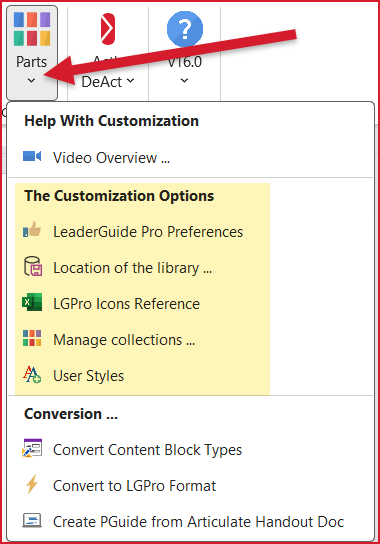
To make these types of changes, use the LeaderGuide Pro Customization wizards to create a Custom Collection.
By creating a Custom Collection you only have to make the changes ONCE and then simply use your custom Collection and this ensures that the LeaderGuide Pro functionality remains intact.
For help with creating a custom Collection, please contact us.
Always Start from LeaderGuide Pro
When you need a new Facilitator Guide, click New on the LGPro ribbon.
You don't need to open a copy of an old document.
If you have existing content you want to use, LGPro provides a number of ways to make it easy to repurpose content:
Use Librarian to Archive and Insert Archived Modules & Lessons
Use Attach to apply a new Collection to an an existing guidebook
Use Insert Images & text Objects to pull in content from other documents.
Formats & Styles
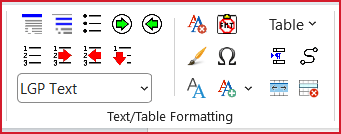
Use the buttons in the Text/Table Formatting group to:
Apply LGPro styles
Insert bulleted and numbered lists
Allow a Content Block to flow over multiple pages
Merge or split Content Block cells
Paste in content from other documents
Add special tables
It is important to use the LeaderGuide Pro styles because:
To do it's work, LeaderGuide Pro relies on coding embedding into many of the LGPro Styles.
Set Your Preferences
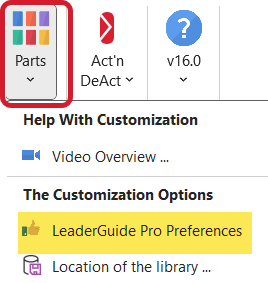
Click Parts > LeaderGuide Pro Preferences to:
Make customizations that will apply to all new guidebooks you create, like
Add your logo
Set up your Copyright information
Set how you want slides to be numbered
And more
Rather than falling back on Word habits:
Use the page layouts in the facilitator and participant guides as provided
Use the styles and formatting as provided
Use the icons and graphic instructional cues as provided
Follow the document structure and page layout conventions
Always insert Content Blocks from the LeaderGuide Pro ribbon
Work with Word's formatting marks turned on
Share Mindfully
Always keep master copies of your LeaderGuide Pro documents.
Only share copies of your LeaderGuide Pro documents with non-users.
Make sure all document contributors and editors understand how to use LeaderGuide Pro.
Create Custom Collections
Start by using LeaderGuide Pro as provided, to get to know and understand how the software helps you work more productively.
Then ... Leverage the included customization functions to ensure your LeaderGuide Pro guidebooks meet your branding and corporate requirements.
LeaderGuide Pro is highly customizable and using the LeaderGuide Pro Customization wizards ensures that your changes will not impact the software's functionality.
Habits to form to ensure SUCCESS with LeaderGuide Pro
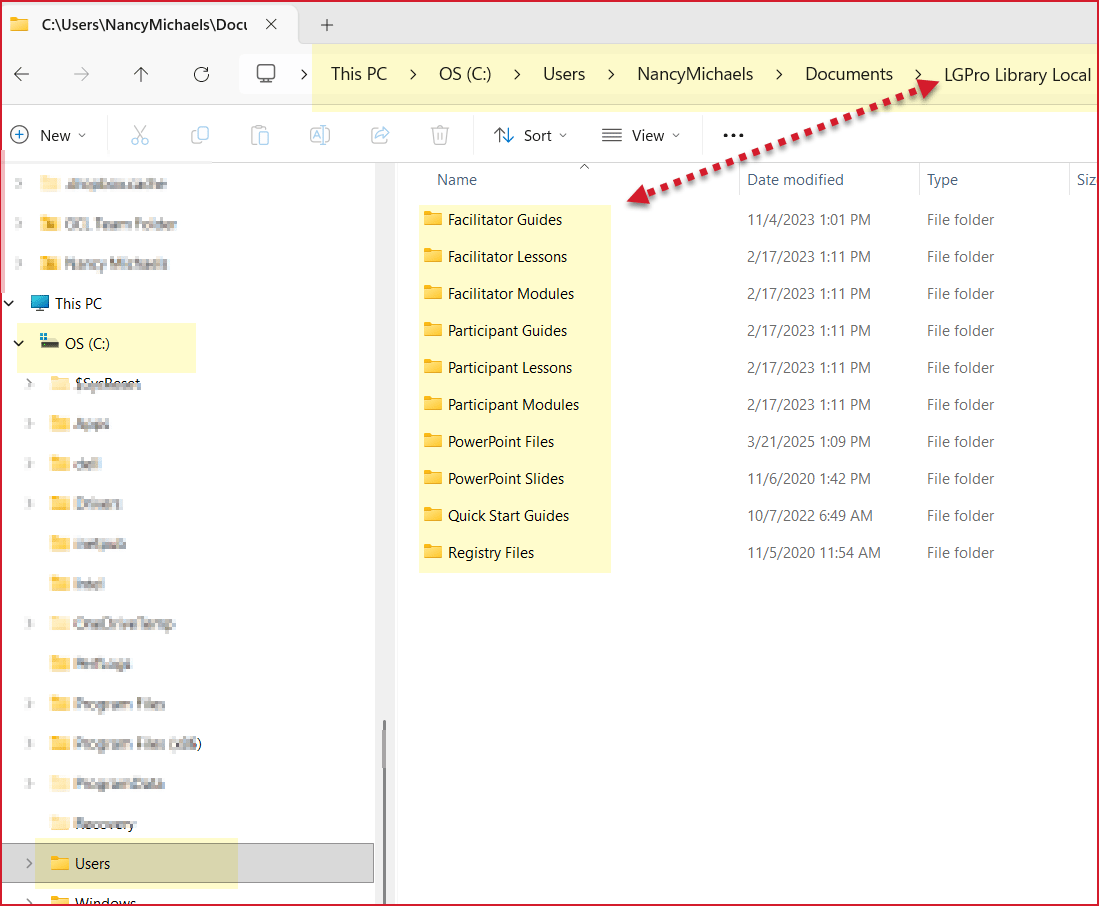
Save to your shared drives, but ALWAS keep a Master copy and your working drafts locally
Because of the automation in LeaderGuide Pro, it is best work ON your computer (Your C drive probably) rather than in One Drive or other shared drive/cloud environments
Word's Formatting Marks are non-printing characters that define tyles, spaces, tables and more
LeaderGuide Pro uses non-printing text to communicate important messages to you as a developer
Because Word's formatting marks are important when working in documents where professional formatting is important, LeaderGuide Pro turns these marks on when you are using the software.
The buttons on the LGPro ribbon are the only way that you access and run the LGPro functionality.
Everything LGPro provides is there for a reason and has a job to do to help you.
If you don't like the looks or formatting of something, use the included Customizing tools to change the characteristics without impacting the functionality.
Every Content Block has unique coding that LeaderGuide Pro uses to run extracts, replacements, searches and more.
If you copy & paste Content Blocks you run the risk of messing up the coding and thus, experiencing unexpected results when using using other LGPro functions.
When you click a button on the LGPro ribbon:
You are kicking off a series of actions.
These actions happen much faster than you could execute them manually.
Yet, you do need to give LGPro a moment to do it's work.
The non-printing red text contains important messages for you as a developer.
LGPro Modules and Lessons have pre-set formats and layouts.
These are designed to maintain professional formatting.
And they provide an at-a-glance, easy-to-use layout.
LeaderGuide Pro includes wizards to make it easy to customize the software.
It is important to use these built in tools to ensure that any changes you make do not impact the software's functionality.
Use the Customization Wizards to change:
Fonts
Styles
Logos
Colors
Default text
Cover pages
Content Block column widths
Guidebook type names
Headers and footers, and more
We recommend that you work locally when using LeaderGuide Pro, so you will be making copies of you files for shared drives anyway, but ...
Because your LGPro files are also Word documents that you will likely share with others who may not be LeaderGuide Pro users ...
Please keep copies of your working files in a safe place
That way it will be easy to recover if a colleague accidently messes something up.
About all the stuff associated with the smart templates
When working in a Facilitator Guide or Participant Guide:
Page Headers display the guidebook type and current Module name.
The Program Name/Course Name on the Cover page is repeated in key spots within the documents.
Module Names appear in the Table of Contents and in the Training at a Glance in a Facilitator Guide.
Lesson Names appear indented under the Module names in the Table of Contents.
A new Lesson always starts with a Lesson Time Block unless you change this in Preferences.
Content Blocks are used to build Lesson pages.
Content Blocks form a Lesson Table that flows automatically from one page to the next until a new Lesson or new Module is added.
The last Lesson in a Module always ends with a Transition Block that displays the name of the next module.
Even Page Footers show the page number and Program Name.
Odd Page Footers show page number and copyright and revision date.
Page breaks and Section breaks appear when Word's formatting marks are turned on to help you avoid deleting them.
Non-printing red text appears at various points in the document to help you avoid deleting important code elements required by LeaderGuide Pro.
Word's non-printing formatting marks are visible to help you maintain a professional appearance - including: