How to Start a New Facilitator Guide

Introduction


Begin by opening Word.

You must open Word because LeaderGuide Pro runs within Microsoft Word.

Even though you will be in Word:

  • You will primarily be using LeaderGuide Pro.

LeaderGuide Pro automates Word and adds functionality you otherwise would not have.
  • The Facilitator Guide you create with LeaderGuide Pro will be a Word document.

  • This gives you a powerful development tool that creates training materials that are easy to share and update.

Good to know as you work with LeaderGuide Pro

If Word is already open:

  • We recommend that you Save and Close any open Word documents that you will not need, to avoid confusion.

As you use LeaderGuide Pro:

  • You will be working with wizards to set preferences, add content, and save time.

When you click OK in a wizard:

  • You will kick off a series of automated actions that will take a few moments to complete.

Pop-up messages will:

  • Let you know the progress of the work

  • And prompt you with what to do next.

Select an option below:
Blank new Word doc and LeaderGuide Pro ribbon

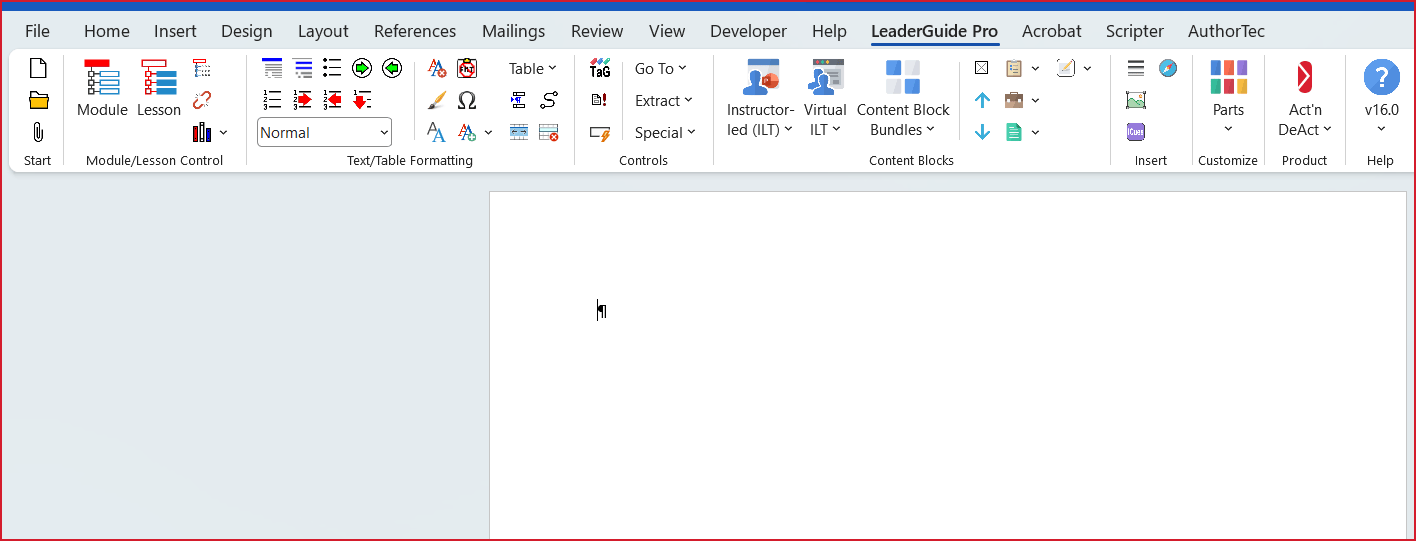
Blank New Word Document & LeaderGuide Pro ribbon

  • This is what you should see as you get ready to start a new Facilitator Guide.

  • Click the LeaderGuide Pro tab along the top of your screen in Word to bring up the LGPro ribbon.

  • Have a blank new Word document showing on your screen.

  • Close other open Word documents to avoid confusion.

The NEW Button on the LeaderGuide Pro ribbon

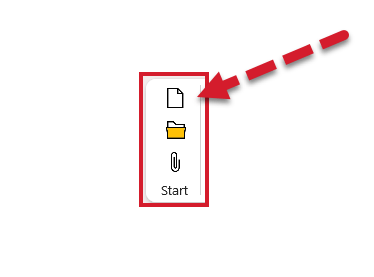
Step 1. Click NEW on the LGPro ribbon in the Start group.

LeaderGuide Pro Ribbon_Start New button

  • This will open the Start a New Guidebook wizard.

  • Use the wizard to complete the first step in setting up your new Facilitator Guide, which involves selecting the:

    • Guidebook type

    • Lesson page layout

    • Collection

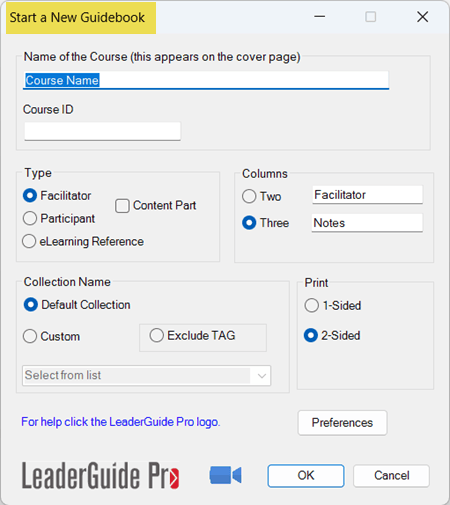
The Start a New Guidebook Wizard in LeaderGuide Pro

Step 2. Use the Start a New Guidebook Wizard

Use this intuitive wizard to set up your base guidebook.

  • Name: The course name you add here can be edited once you are in your new document.

  • ID: This optional Course ID can be used to search for your document in Windows File Explorer, and it is required if you plan to extract an audit trail.

  • Type: We recommend that you start by building a Facilitator Guide.

  • Columns: We recommend using 3-column for Facilitator Guides and 2-column for Participant Guides.

  • Collection: The Collection sets the look & feel of your new Facilitator Guide.

  • Exclude TAG: This removes the Training at a Glance from your new facilitator guide.

  • Print: We recommend leaving this setting as 2-Sided.

  • Preferences: Click Preferences to adjust global settings that impact your documents.

  • Logo: Click on the LeaderGuide Pro logo for guidance on using this wizard.

  • Video camera: Click to view a video tutorial.

  • OK: Click OK to start the build of your new Facilitator Guide. You will be prompted to Save your new file.

The Start a New Guidebook Wizard in LeaderGuide Pro

As You Start a New Facilitator Guide

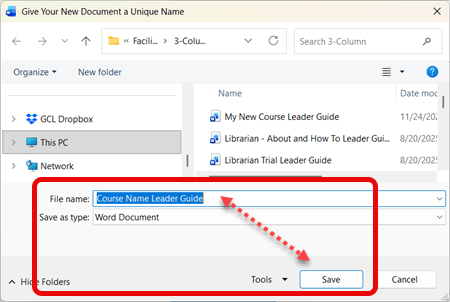
When prompted, SAVE your new Guidebook. It is a Word document and you Save it just like any other Word doc.

  • File Name: The file name will appear as your course name, appended with the phrase “Leader Guide”

  • Edit the File Name as needed

  • Save: Click Save

We recommend that you Save to the locaation LeaderGuide Pro defaults to.
  • This way, when you click Open in the LGPro ribbon, you will be taken to your document.

After you SAVE, you will see the Guidebook Design Template wizard.

  • This new feature of LeaderGuide Pro allows you to quickly and easily drop in your course outline.

  • Proceed to the next lesson to learn how to work with this wizard.

SAVE your new guidebook

Step 3. Save your New Facilitator Guide

When prompted, SAVE your new Guidebook. It is a Word document and you Save it just like any other Word doc.

  • File Name: The file name will appear as your course name, appended with the phrase “Leader Guide”

  • Edit the File Name as needed

  • Save: Click Save

We recommend that you Save to the location LeaderGuide Pro defaults to.
  • This way, when you click Open on the LGPro ribbon, you will be taken to your document.

After you SAVE, you will see the Guidebook Design Template wizard.

Save new facilitator guide to LGPro Libray

About Saving Your LGPro Files

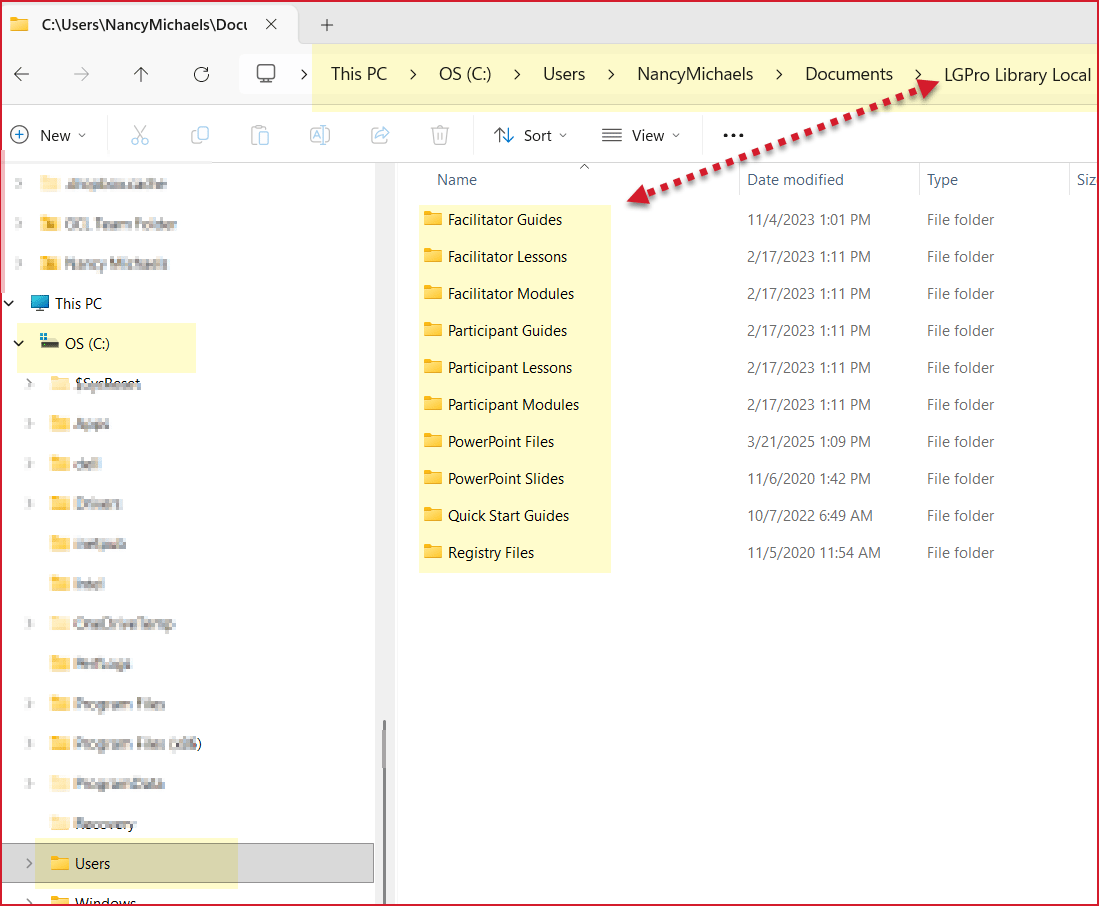
When LeaderGuide Pro™ is installed on a computer:

  • Two “Library Folders” are added into your Documents folder on your C drive, in the User area.

The folder names are:
  • LGP Library Local

  • LGP Library Master

The file path to these folders looks like this:

C:\Users\Your Name\Documents\LGPro Library Local\

  • This folder is for your personal use

C:\Users\Your Name\Documents\LGPro Library Master\

  • This folder is meant to be moved (by one person) to a shared location.

While you are not required to use these folders:
  • They make it easy to quickly save and easily find your LeaderGuide Pro files.

When you click OPEN in the Start group on the LGPro ribbon:

  • You will be taken to your LGPro Library Local folder.

When you click LIBRARIAN>Insert or LIBRARIAN>Archive on the LGPro ribbon:

  • You will be taken to your LGPro Library Local folder.