- Course Overview: Build a Facilitator Guide
- Module 1: Basic Setup
- Lesson 3: Get to Know Your New Facilitator Guide
Get to Know Your New Facilitator Guide
What You Need to Know to Work with LeaderGuide Pro in Word
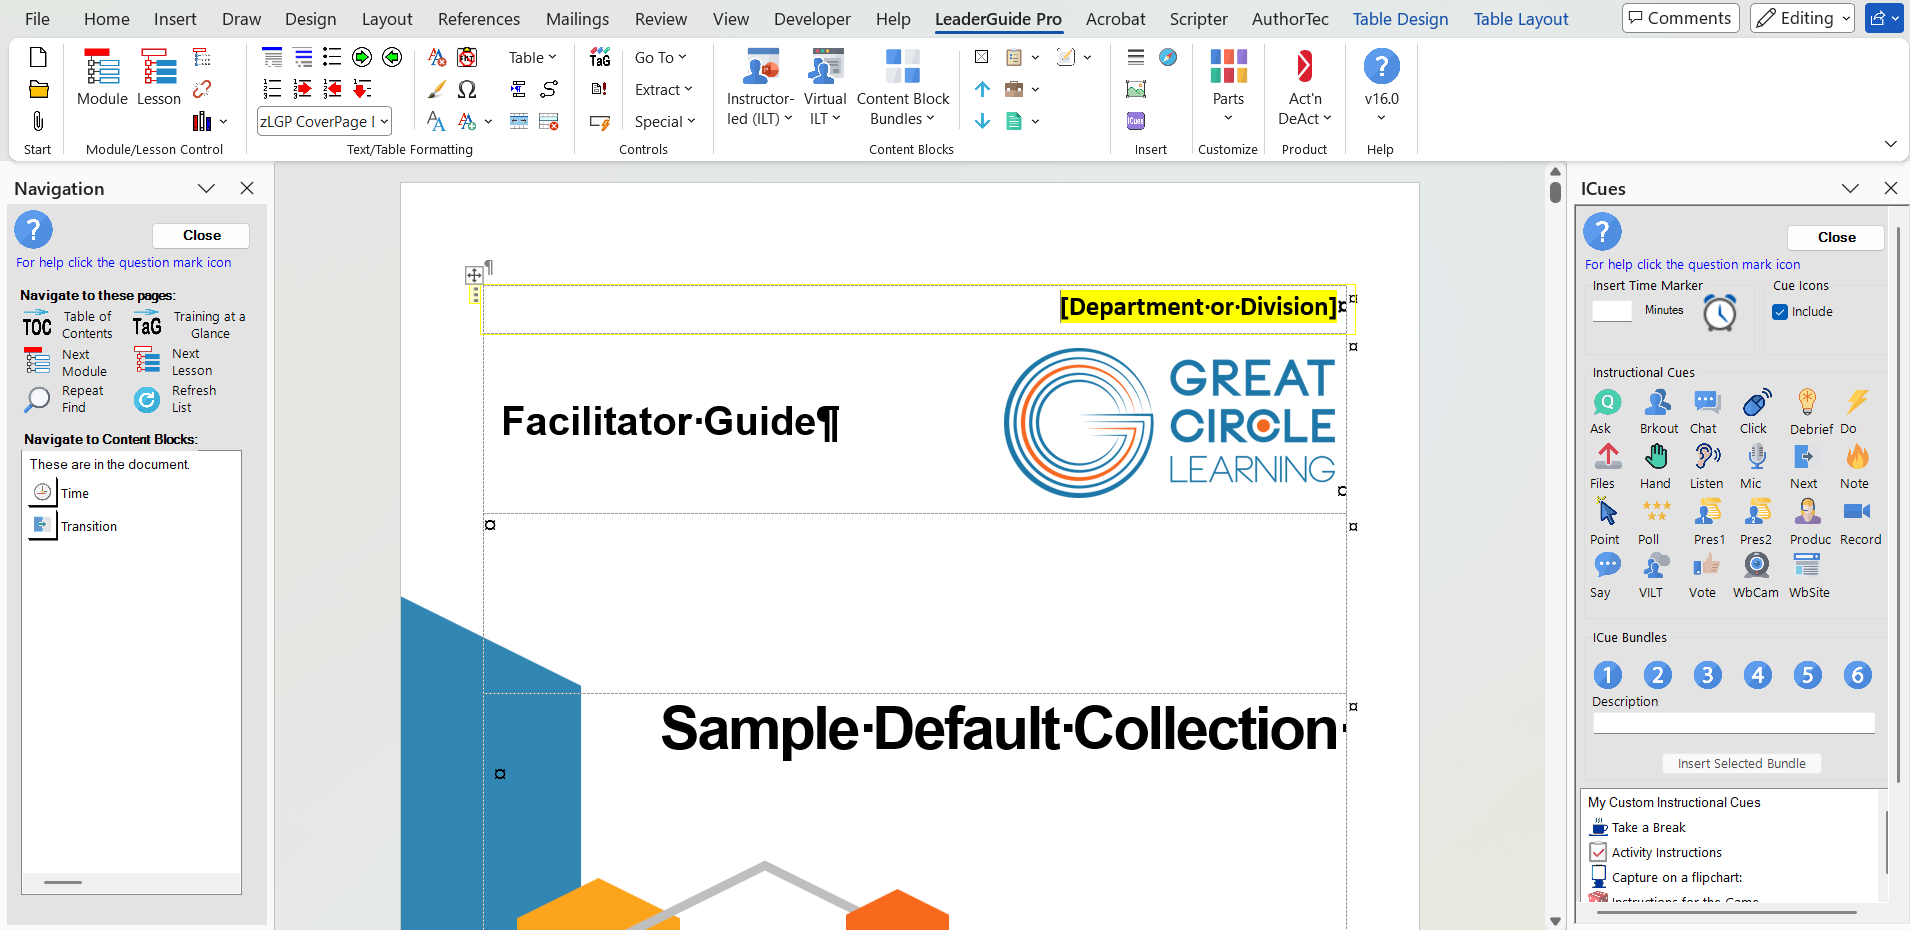
Once you complete the setup of your new facilitator guide and save it ... this is what your screen will look like.

About what you are seeing on your screen
There's a lot going on here, so let's break it down.
Select an option below:
- Along the Top
- On the Left
- In the Middle
- On the Right
On the Right side of your screen
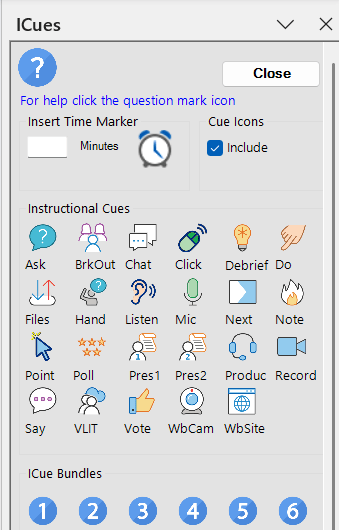
The ICues Pane
-
ICues are:
-
small icons
-
and formatted text phrases
-
To use to prompt the Facilitator and the Producer, if running VILT.
-
-
Click the Close button to remove this from your scrren.
-
To re-open, click the ICues button in the Insert group on the ribbon.
In the Middle of your screen
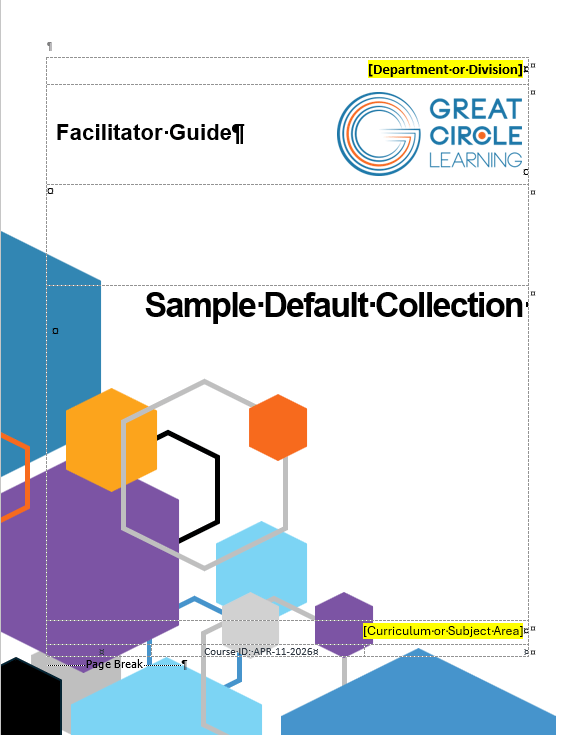
The Cover page of your new Facilitator Guide
-
This page is followed by at least 12 more pages.
-
Depending on the Guidebook Design Template (Course Outline) you entered when setting up this new Facilitator Guide.
-
And depending on the Collection you selected when setting up your new Facilitator Guide, your Cover page may look different than what you see here.
-
-
The extra "stuff" you see are Word's non-printing formatting marks.
-
LeaderGuide Pro turns these on because they help you know exactly where your cursor is, which is often important.
-
And they sometimes hold important messages for you, as the developer.
-

On the Left side of your screen
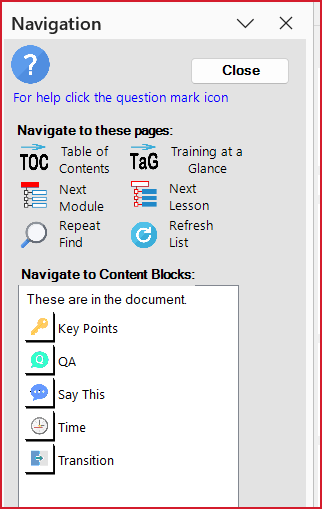
The Navigation Pane
-
Click the Close button to remove this from your screen.
-
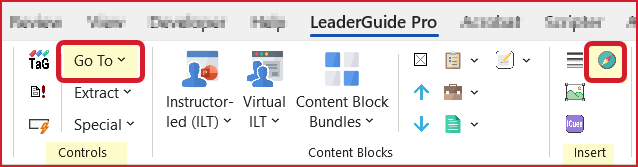
To re-open, click the Navigation button in the Insert group on the ribbon.
-
You can also navigate using the Go To button in the Controls group on the ribbon.
Along the top of your screen
The LeaderGuide Pro Ribbon
-
Keep this ribbon showing.
-
You must use it to build out your facilitator guide.
-
Hover your cursor over the buttons to see screen tips describing what they do for you.

Everything in your new facilitator guide is there for a reason.
-
Resist the urge to start deleting or reformatting until you have a deeper understanding of what LeaderGuide Pro does and how it helps you.
Given that you are in Word AND LeaderGuide Pro:
-
It is important to learn when you must use LeaderGuide Pro and when it is best to use Word.
-
A good rule of thumb is to always use LeaderGuide Pro first.
Essentially, you will use Word to add text and to Save your work, and you will use LeaderGuide Pro for just about everything else.
Your new document contains three sections ...
And an optional fourth section.
Let's take a look.
Select an option below:
- Up Front Matter
- Introductory Materials
- Modules (Instruction)
- Appendix (Optional)
End of Modules Section
Before you add an Appendix
Go to the end of the Modules section on the last page of your Facilitator guide.
-
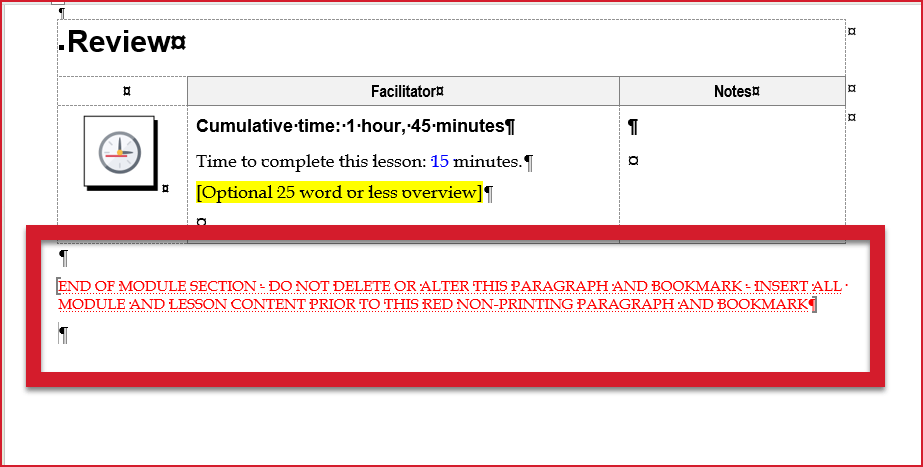
Normally, the very end of a Facilitator guide is this last piece of non-printing red text.
-
It signals the end of the instructional content in the Modules section of your Facilitator Guide.
-
You will not see this non-printing red text if Word's formatting marks are turned off.
Before adding an Appendix:
-
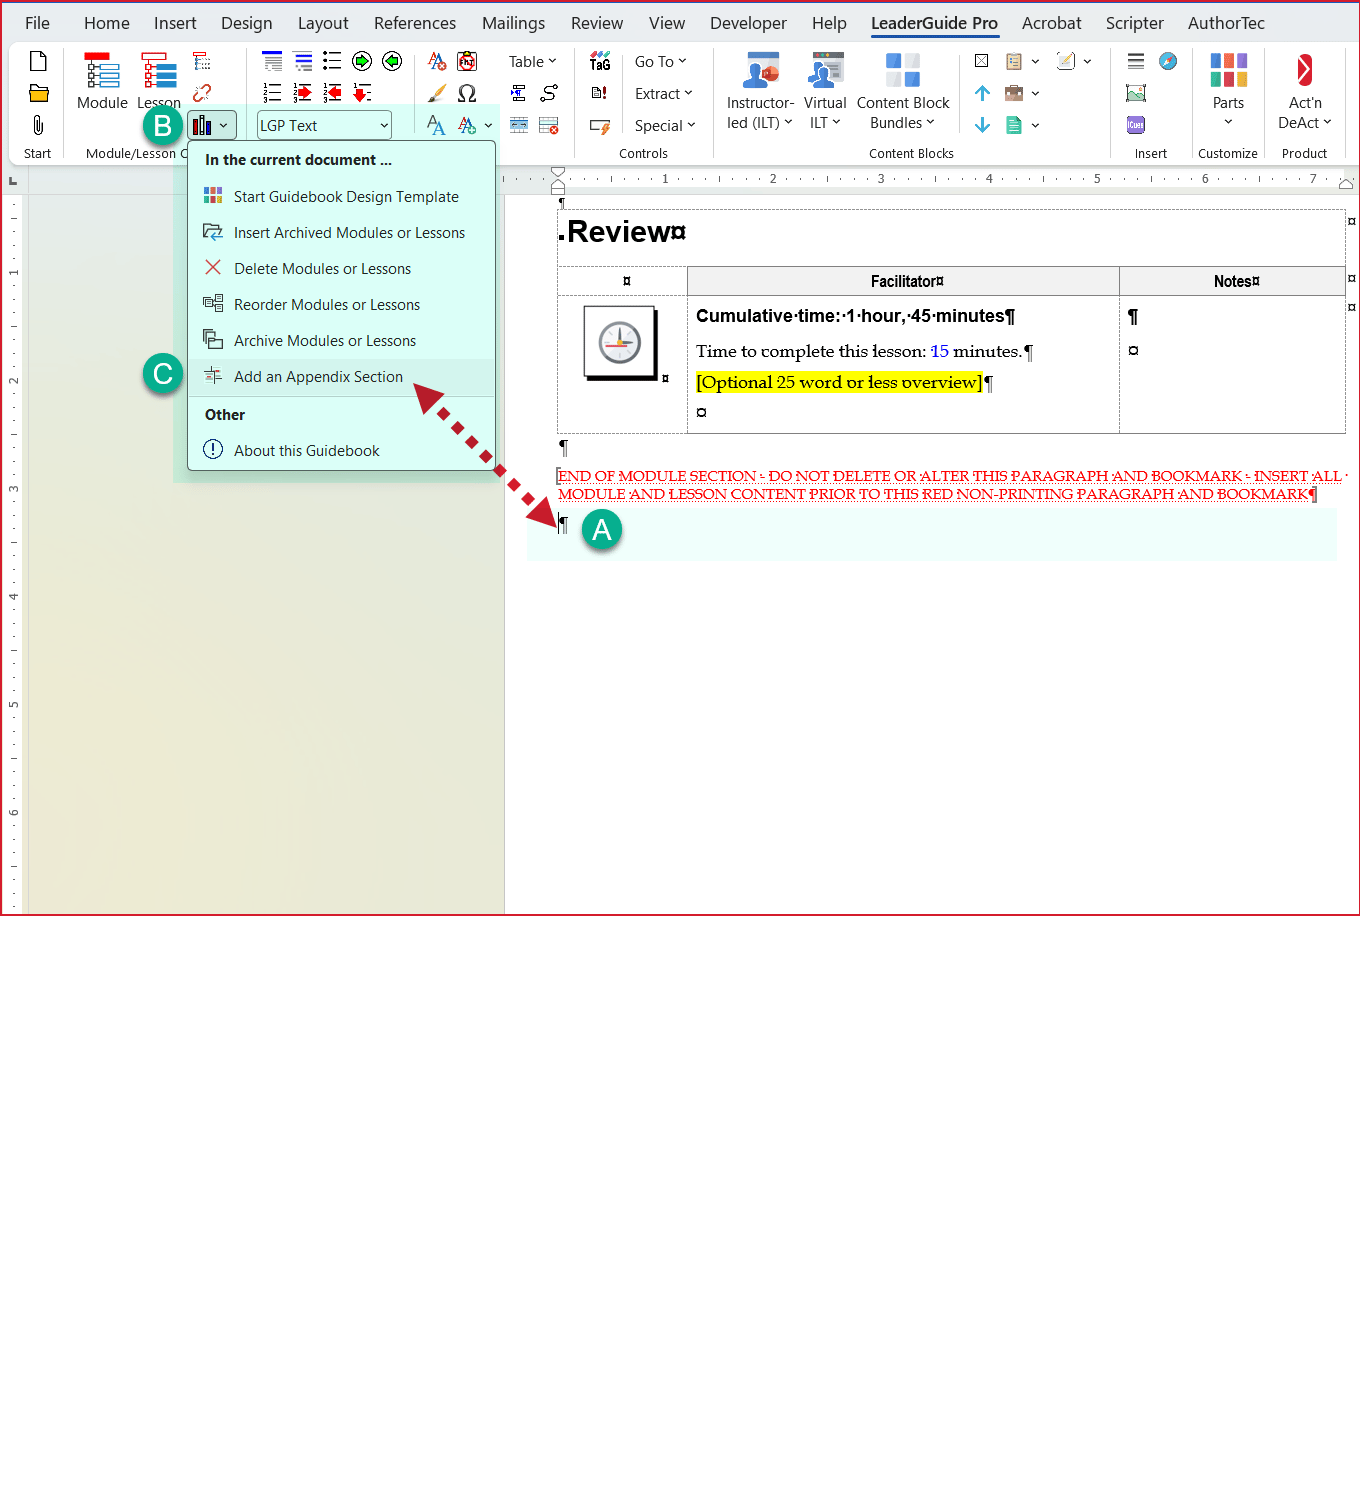
Place your cursor by a paragraph mark below this non-printing red text.
Add an Appendix
This will be added as a new section, with unique headers, footers and page numbers.
It will appear in the TOC under a category labelled Resources.
A. With your cursor below the End of Modules section non-printing red text:
B. Click Librarian in the Module/Lesson Control group.
C. Click Add an Appendix in the drop-down menu.
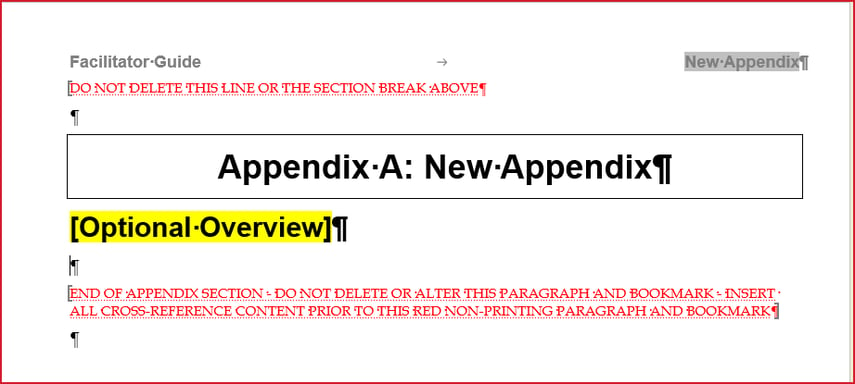
This is what you will see:
To work in the Appendix:
-
Type over the phrase "New Appendix" with your appendix name.
-
Type over the phrase "Optional Overview" with your appendix topic.
-
Place your cursor by the paragraph mark below phrase "Optional Overview" to add your Appendix content.
-
Do NOT type below the End of Appendix non-printing red text.
Module Overview Page
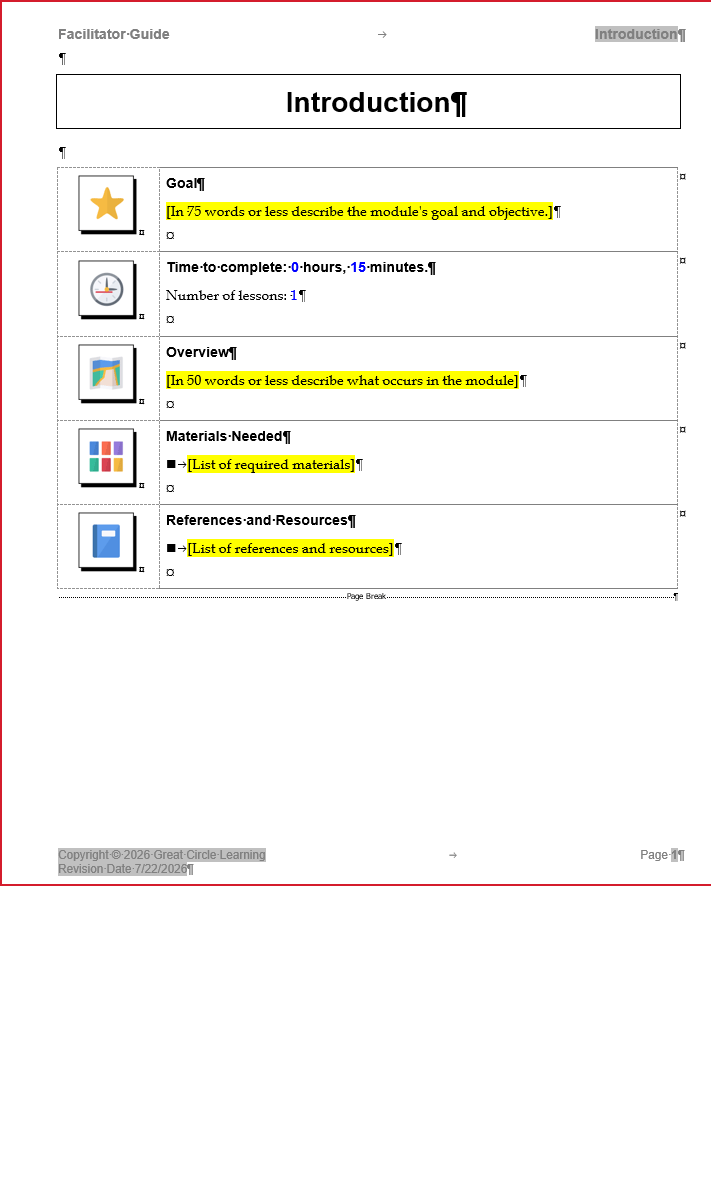
This page is only found in Facilitator Guides.
The Module Overview page sets the stage for what the instructor needs to do to deliver only this segment of the training.
-
Do Not:
-
Delete this page.
-
Change the Styles on this page.
-
Add more Content Blocks to this page.
-
-
To edit the Module Name at the top of the page:
-
Type over the existing name.
-
Click Update All Fields in the Controls group.
-
-
The Module Name you add here is used in the:
-
Table of Contents
-
Training at a Glance
-
Page header for just this module.
-
-
Goal
-
Click in the yellow highlighted prompt and type in the training goal for just this Module.
-
-
Time to complete
-
Do NOT type in this block.
-
LeaderGuide Pro will take care of the Module time for you as long as you enter Lesson times on the Lesson pages that follow.
-
If you choose not to use the Lesson Time Blocks, then you can carefully type over the blue numbers with the Module time.
-
This information is used on the Training at a Glance page.
-
-
Overview
-
Click in the yellow highlighted prompt and type in a description of what happens in just this module.
-
This information is used on the Training at a Glance page.
-
-
Materials Needed
-
List the materials needed for just this Module.
-
-
References and Resources
-
Click in the yellow highlighted prompt and type in any references or resources for just this module.
-
-
Page Break
-
Do NOT delete the page break.
-
New Lesson Page
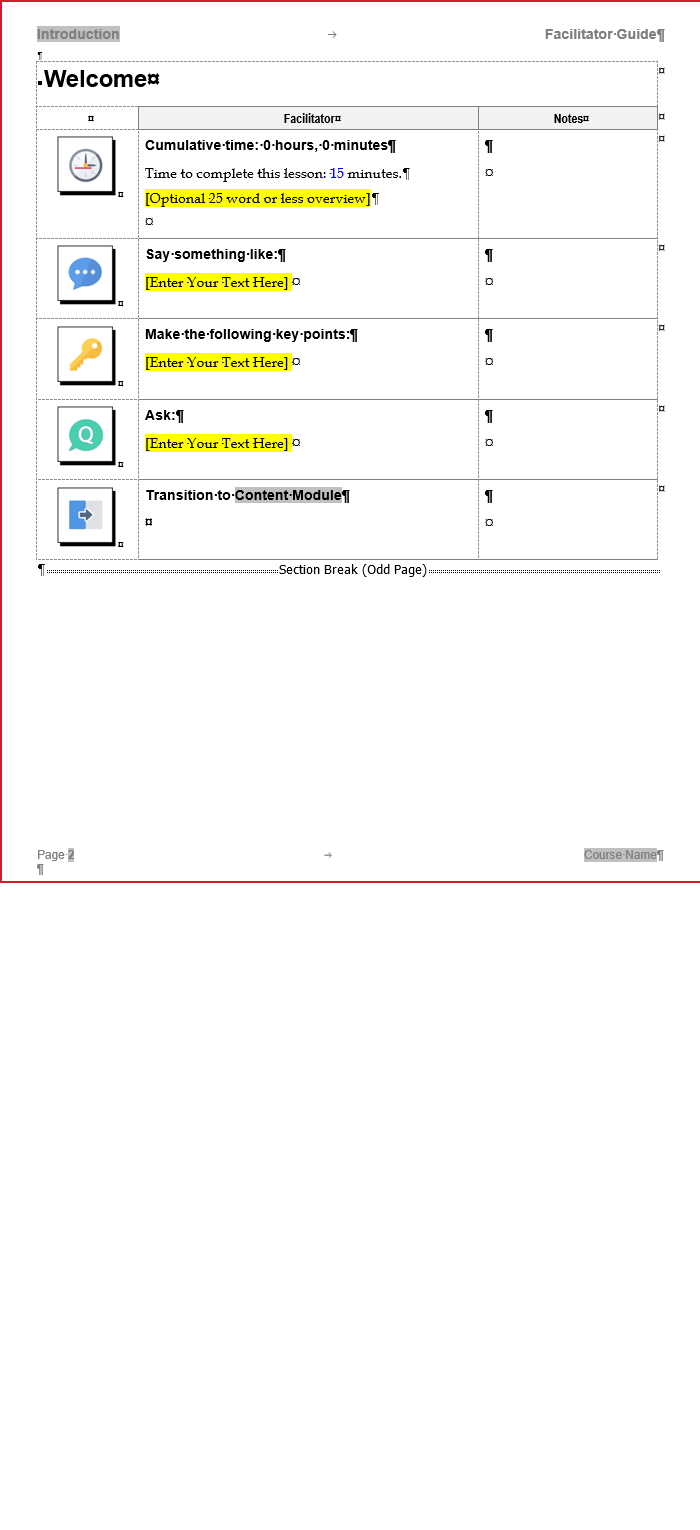
This page is where the instruction begins.
The New Lesson page is a table that will over subsequent pages as needed, as you add content.
-
Do Not:
-
Copy & paste icons over each other.
-
Push and pull the table column widths.
-
Delete the page break or section break at the end of the lesson.
-
-
To edit the Lesson Name at the top of the page:
-
Type over the existing name on the first page of the lesson.
-
Click Update All Fields in the Controls group.
-
The Lesson Name will appear in the Table of Contents.
-
-
The Lesson Time block appears at the start of every lesson, at the top of the first page.
-
ONLY type in time in minutes
-
ONLY type over the blue numbers
-
The Lesson times will be added up by LeaderGuide Pro and used to calculate the Module time.
-
-
Content Blocks
-
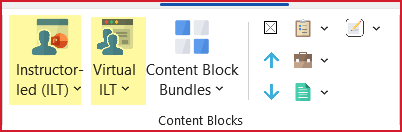
With your cursor in the Time block, click ILT or VILT in the Content Blocks group.
-
From the drop-down menu, click the Content Block you want to add. It will be inserted immediately below the block where your cursor is sitting.
-
-
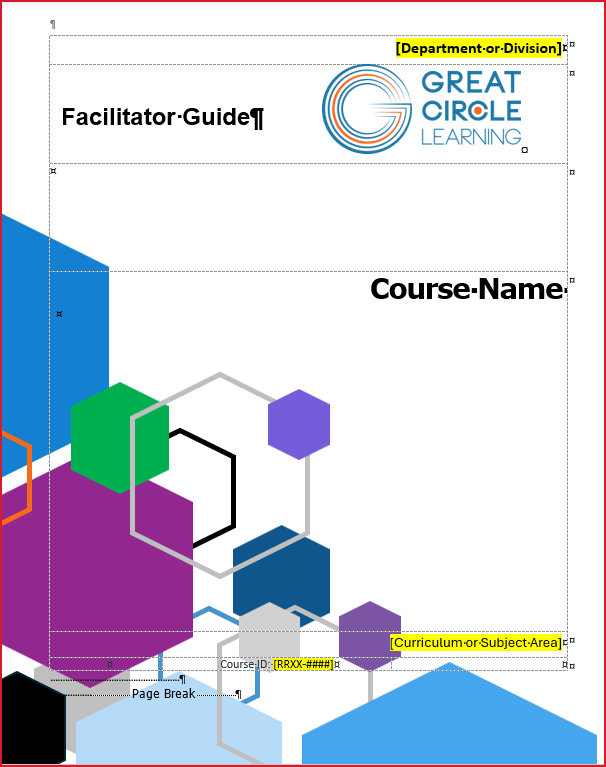
The Cover Page
Every LeaderGuide Pro Cover page includes:
-
A coded placeholder for your logo.
-
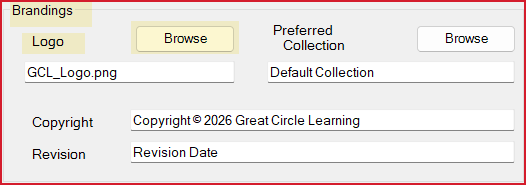
To replace the default Great Circle Learning logo with your logo
-
Click Parts > LeaderGuide Pro Preferences on the LGPro ribbon
-
Under Brandings, click Browse next to Logo to select your logo.
-
-
-
A coded placeholder for your course name.
-
The Course Name repeats at various places in your document.
-
To edit the course name, simply type over the existing name.
-
Do NOT change the Style (font, etc.)
-
-
Optional Placeholders for:
-
The Department or Division the training is for - okay to delete
-
The Curriculum or Subject Area - okay to delete
-
The Course ID - okay to delete, BUT:
-
The Course ID is required if you LeaderGuide Pro to create an audit trail for you.
-
You can use the Course ID in Windows Explorer to find your Facilitator Guide and related documents.
-
-
To change the appearance of the Cover page:
-
Choose a different Collection.
-
To change the phrase "Facilitator Guide" using the customize naming conventions function.
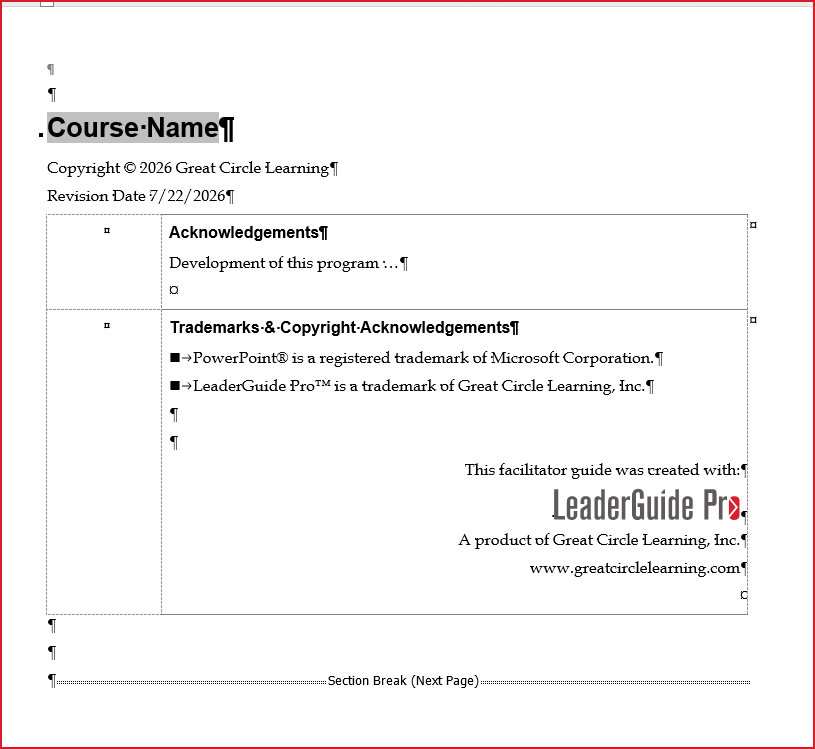
The Acknowledgements Page
Every LeaderGuide Pro Facilitator Guide contains an Acknowledgements page.
-
The Course Name repeats from the Cover page.
-
Includes coded placeholders for your Copyright and the Revision Date.
-
Do NOT delete or change the Style (font, etc.) of the Copyright and Revision Date.
- This information populates the odd-numbered page footers.
-
-
-
The Revision Date shown is the date you started your new Facilitator Guide.
-
To edit the date shown, simply type over the existing date.
-
-
To edit the Copyright and to change the phrase "Revision Date"
-
Click Parts > LeaderGuide Pro Preferences on the LGPro ribbon.
-
-
The table on this page:
-
Displays the two-column LeaderGuide Pro page layout.
-
Can be edited or removed.
The Section Break on this page:
-
Must NOT be removed. (If you turn Word's formatting marks off, you will not see the Section Break.)
To change the appearance of the Acknowledgements page:
-
Choose one of the other included Collections.
-
Or create a custom Collection. (Contact us for assistance with this.)
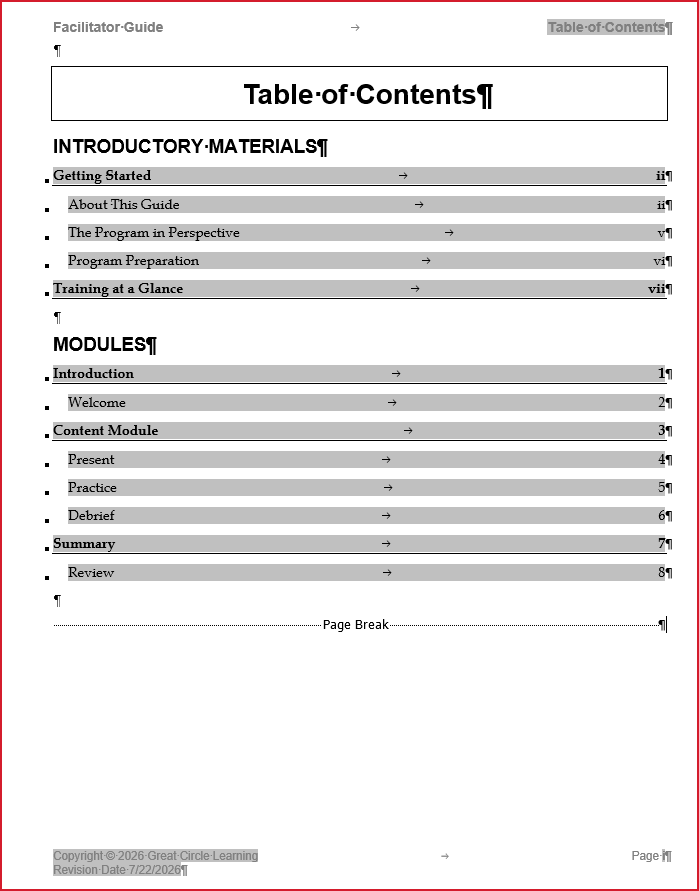
The Table of Contents (TOC)
-
The page header displays the guidebook type and the section of the Facilitator Guide that you are in.
-
The TOC organizes the contents into two main sections:
-
Introductory Materials - To help the facilitator prepare for delivery.
-
Modules - The instructional content that guides the facilitator as to what to say and do.
-
-
Do NOT delete content or change the Styles (font, etc.) of content on this page.
-
LeaderGuide Pro builds and updates the TOC for you.
-
Do NOT type on this page.
-
-
To edit this page:
-
Go to the Module or Lesson page and type over the existing Module or Lesson name.
-
Then, click Update All Fields in the Controls group on the LGPro ribbon.
-
-
-
To navigate from this page:
-
Hover over a page number and press CTRL + Click
-
The Table of Contents MUST end with a Page Break:
-
As content is added to the TOC, it will naturally flow over to additional pages as needed, without adding page breaks.
-
But the TOC must end with a page break. Do NOT delete the page break. (If you turn Word's formatting marks off, you will not see the Page Break.)
To change the appearance of the TOC:
-
Choose a different Collection.
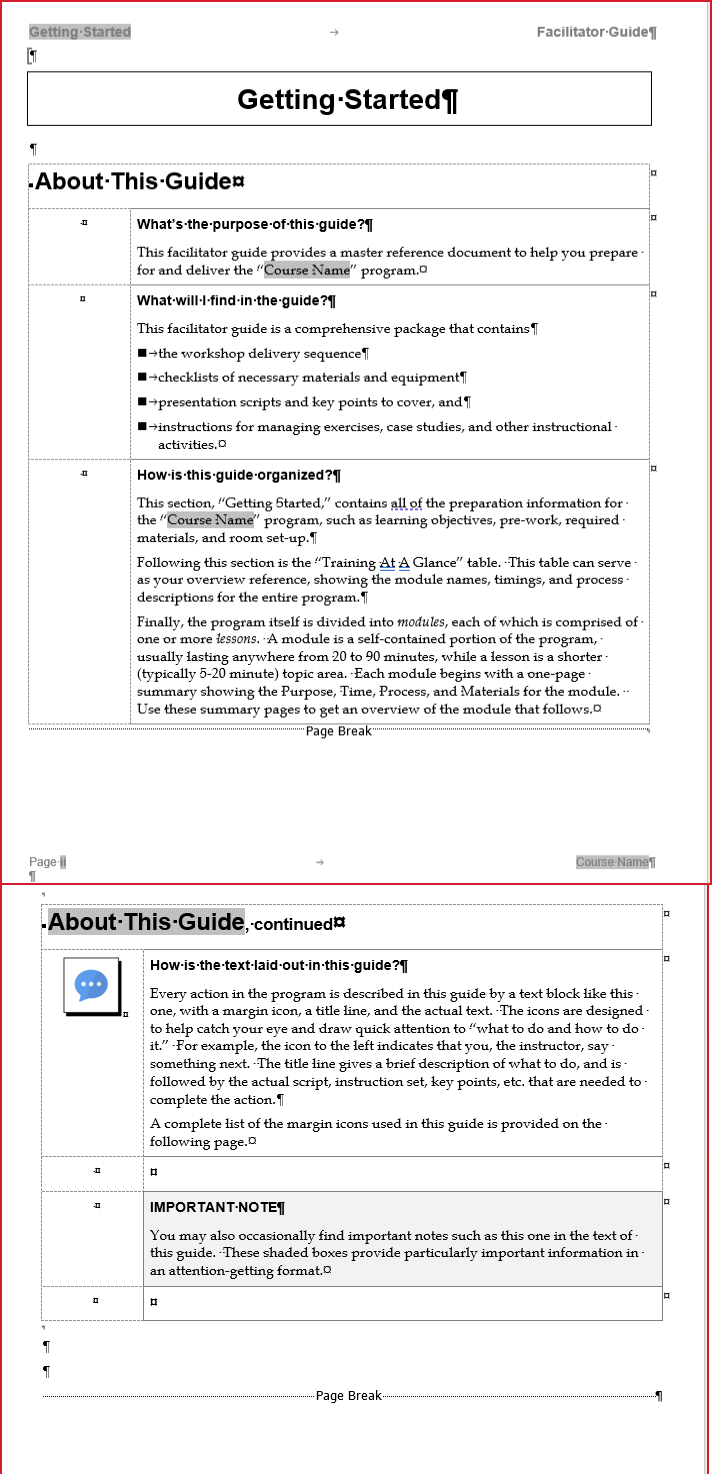
Getting Started
About This Guide
These first two pages contain default text that orients your instructors to:
-
what they will find in this Facilitator Guide
-
and how it is organized.
To edit the text on these two pages:
-
For one time use, you can edit this text by simply typing over it.
-
To customize this text so that your new Facilitator Guides always display your content:
-
Create a Custom Collection.
-
Edit the Getting Started: About This Guide pages
-
To edit the Course Name that appears in the grey fields and the even-numbered page footers:
-
Go to the Cover page
-
Type over the existing name
-
Click Update All Fields in the Control group on the LGPro ribbon
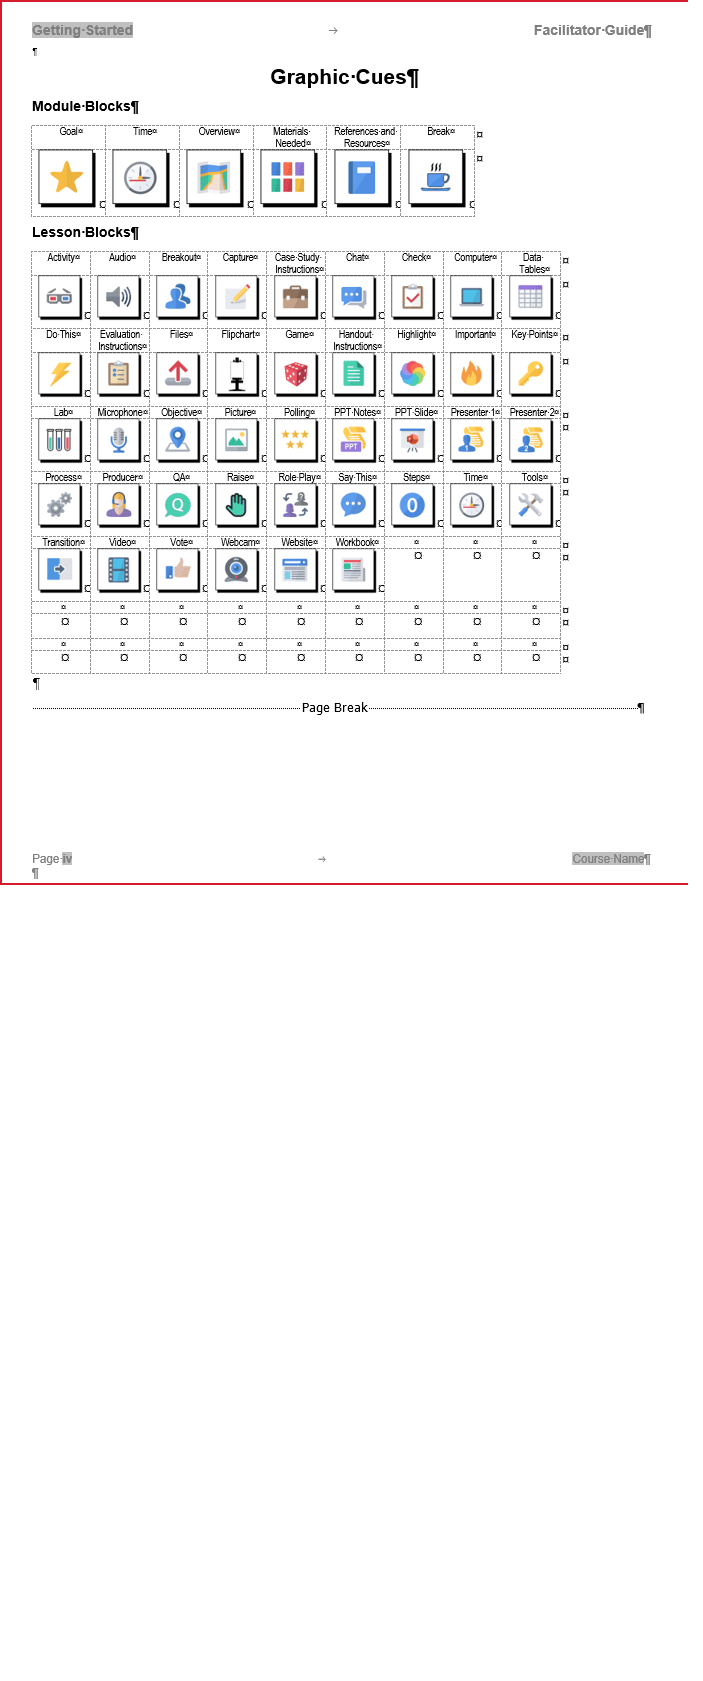
Graphic Cues Page
Every Facilitator Guide Guide contains a Graphic Cues page.
This page displays all of the icons available for use in the Facilitator Guide.
-
The graphic cues/icons are based on the Collection in use, which is chosen as you start a new Facilitator Guide.
-
To change the icons, choose a different Collection. when starting your Facilitator Guide.
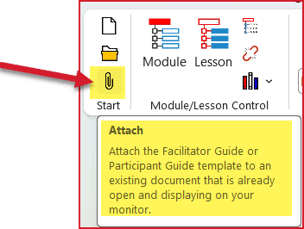
- To change the Collection in use in an existing guidebook, use the Attach
function, in the Start group.
-
-
After you are done building your Facilitator Guide you can opt to change the display to only those icons in use in your guidebook.
-
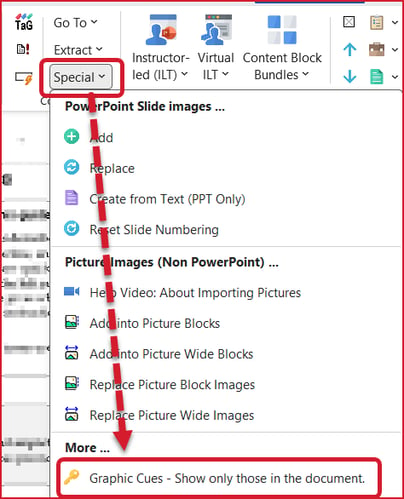
Click Special in the Controls group
-
Select Graphic Cues - Show only those in the document
-
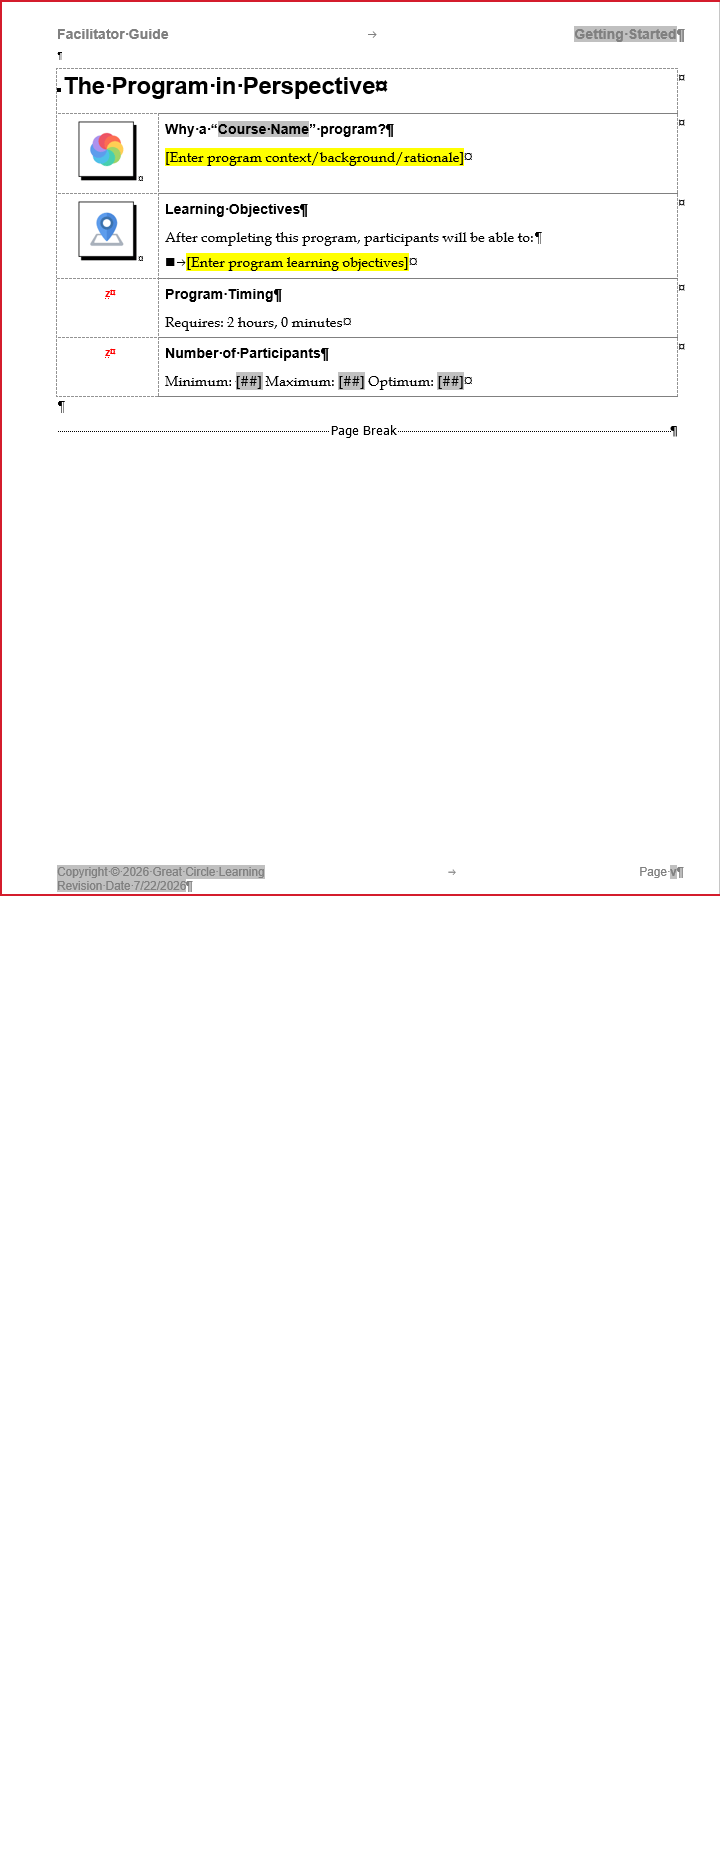
The Program in Perspective Page
This page is found only in a Facilitator Guide.
The Program in Perspective contains placeholder with prompts for you to add information to orient the trainer:
-
Why this training is important.
-
If you extract a Participant Guide from this Facilitator Guide, what you enter here will be copied over into the Introduction section of the Participant Guide.
-
-
What the participants will be able to do upon completion of the course.
-
The Learning Objectives will also be copied over into the Introduction section of the Participant Guide if you run an extract from this Facilitator Guide.
-
-
How much time is required to deliver the training.
-
LeaderGuide Pro will handle the timing as long as you enter Lesson and/or Module times.
-
-
The minimum and maximum number of participants this course is designed for.
The red z you see in column one is:
-
A non-printing character used by LeaderGuide Pro.
Do NOT delete the page break.
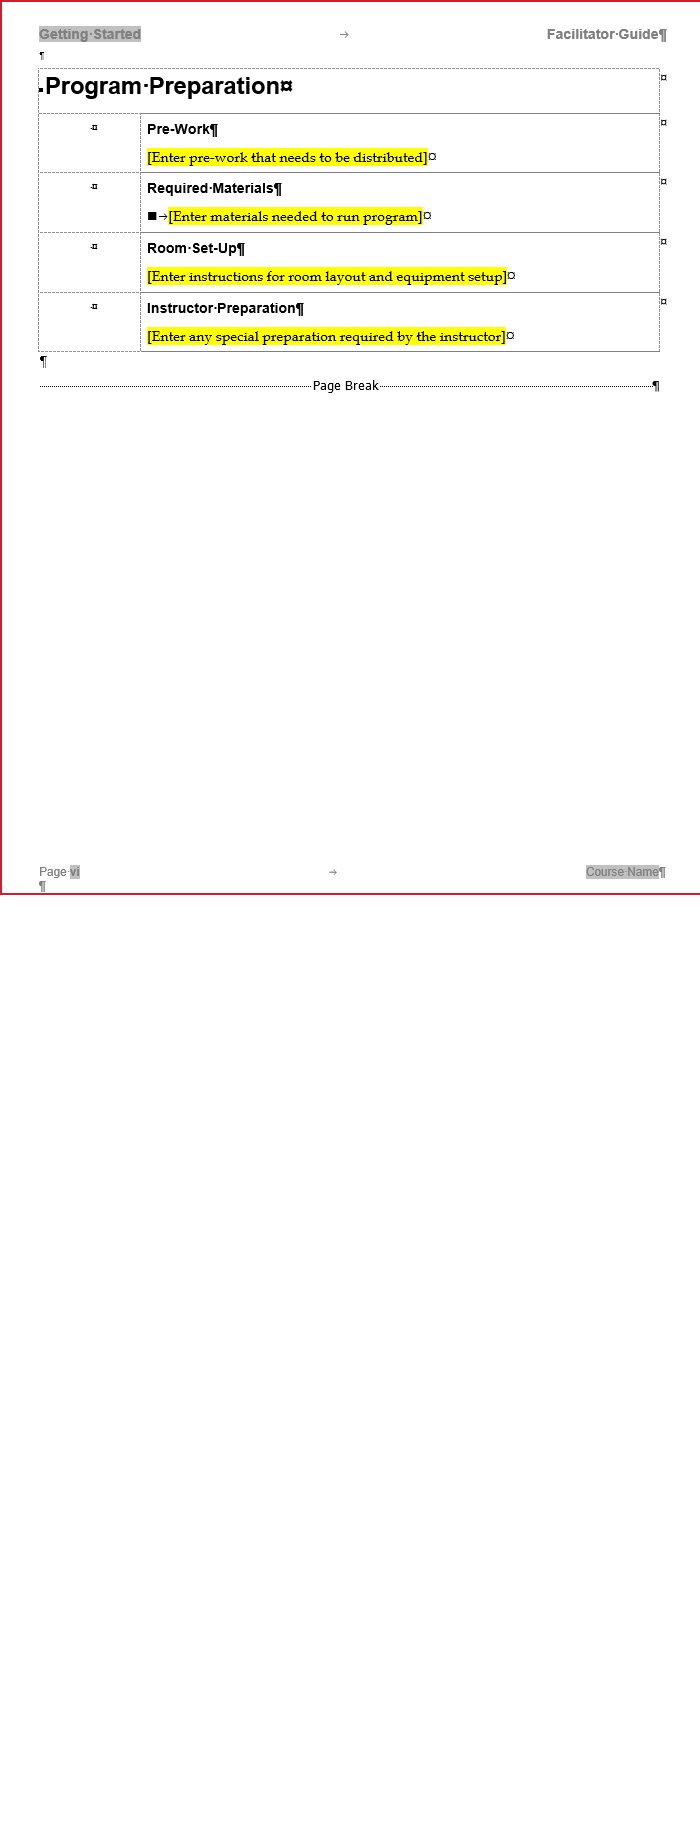
The Program Preparation Page
This page is found only in a Facilitator Guide.
The Program Preparation page contains placeholders with prompts for you to add information to help the Facilitator prepare to deliver the training.
-
Pre-Work
-
If there are activities or reading the participants must complete before attending the training, list those items here and describe what the Facilitator needs to do to distribute, collect, verify completion.
-
-
Required Materials
-
List all the materials the trainer must have on hand to deliver the training.
-
Include the quantities needed.
-
Describe how/where the materials can be obtained.
-
-
Room Set-Up
-
Describe how the training should should be arranged.
-
Include a graphic of the layout, if available.
-
-
Technical Requirements
-
Copy & paste the Room Set-Up block (table row).
-
Change the headline to Technical Requirements;
-
List/describe the technical requirements.
-
-
Instructor Preparation
-
List/describe what the trainer must do/know to effectively deliver the training.
-
The page break
-
Do NOT delete.
-
This page will flow over to subsequent pages if needed, without page breaks, but it must end with the page break you see here.
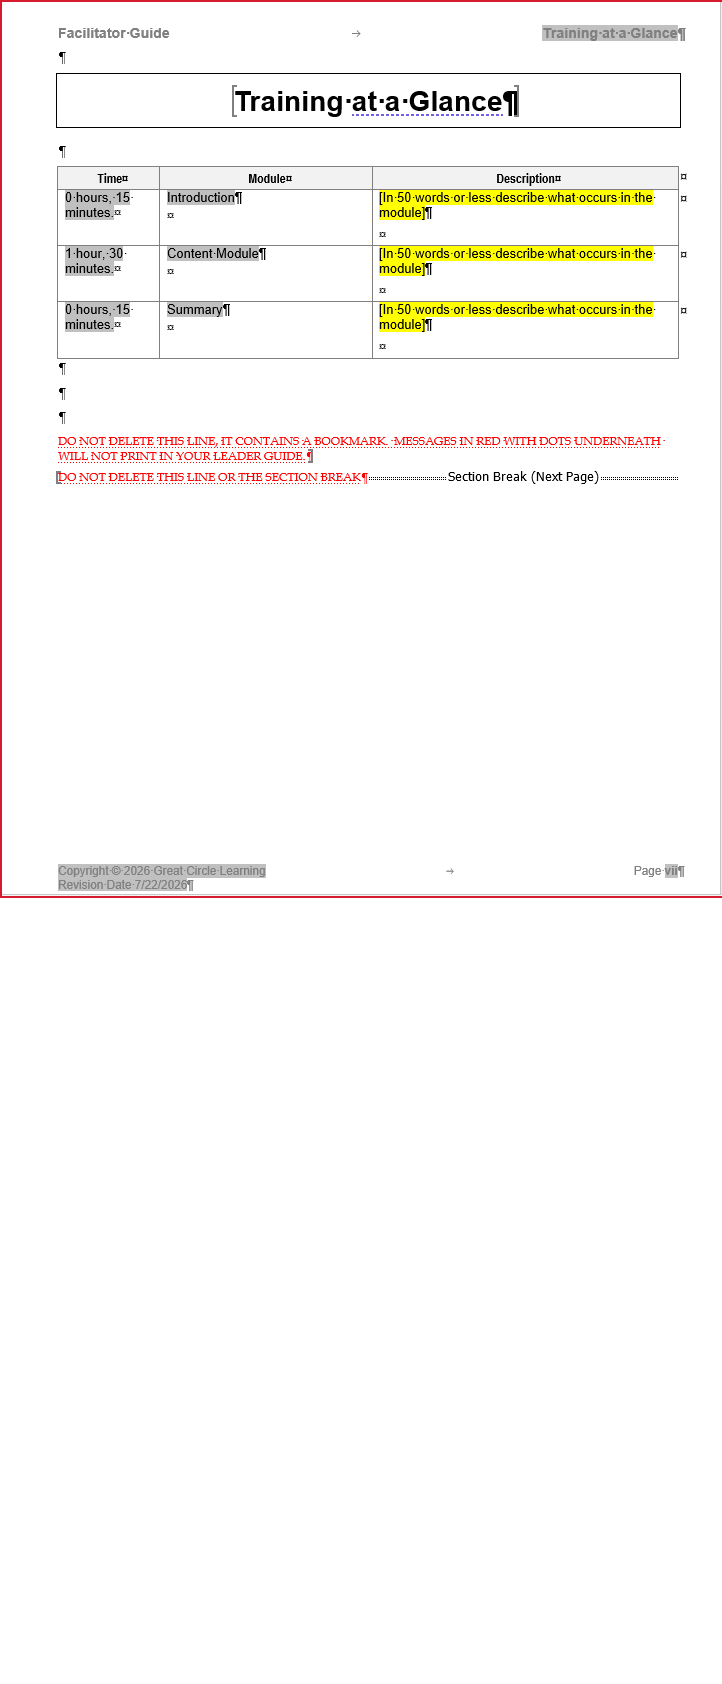
The Training at a Glance (TAG)
This page is found only in a Facilitator Guide.
The Training at a Glance contains placeholders that are filled in and updated for you by LeaderGuide Pro.
-
Do Not:
-
Type on this page.
-
Delete this page.
-
Delete the non-printing red text and the Section Break at the end of this page.
-
This page will flow over to subsequent pages if needed, without page breaks, but it must end with the red text and Section break you see here.
-
-
This page contains a table with placeholders for:
-
The name of each Module in the training program.
-
The time required to run each Module.
-
A brief description of what goes on in each Module.
-
-
LeaderGuide Pro:
-
Gathers the information for this page from the Module Overview pages that start every topic in your course.
-
Updates the information on this page every time you click Update All Fields in the Controls group.
-
-
As you add more Modules, you can update this page:
-
Click TAG in the Controls group.
-