


Basics
How to Create a Custom Guidebook Design Template
Add Your Own Course Outlines into the Guidebook Design Template Wizard to Streamline Start-up
Click Open on the LeaderGuide Pro ribbon and place an existing facilitator guide or participant guide on your screen
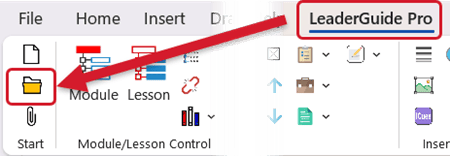
| You must have a LeaderGuide Pro guidebook open and on your screen to use the buttons on the LeaderGuide Pro ribbon |
|
📍TIP: Create and save a new facilitator guide, using a Collection you prefer, and naming it something like "Generic." Then you can open that one for actions like thisBecause you are not going to work in the open guidebook on your screen - you simply need it there to use the LeaderGuide Pro ribbon |
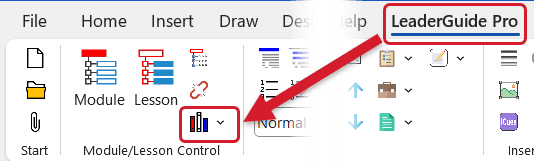
Click Librarian on the LeaderGuide Pro ribbon
|
📍TIP: Hover your cursor over a ribbon button to see the button's name You will also see a brief description of what the button does for you |
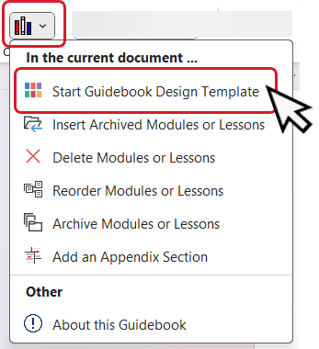
This opens the Librarian menu
-
Select the first option: Start Guidebook Design Template
The Guidebook Design Template wizard opens
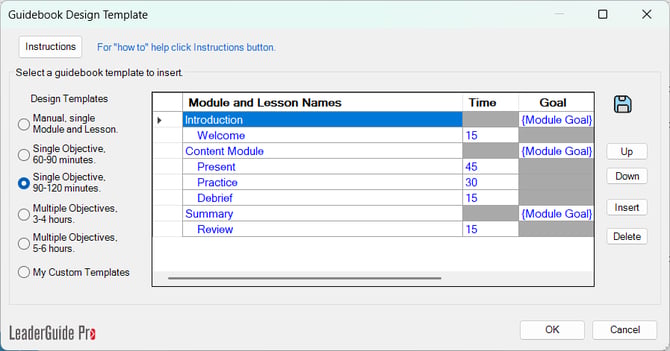
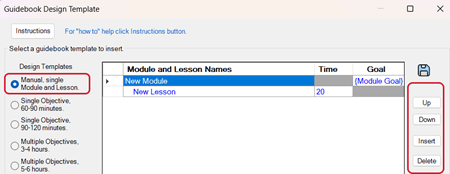
Select any of the included starting point Design Templates (course outlines) to work from
- The Guidebook Design Template opens with the Single Objective, 90-120 minutes outline selected
|
📍TIP: Select the first option, Manual, to start from a clean slate
|
|
⭐Your custom Template must start with a Module followed by a Lesson
Every LeaderGuide Pro Facilitator Guide and Participant Guide must have at least one Module with at least one LessonEvery Module has at least one Lesson
|
If you start from the Manual option:
-
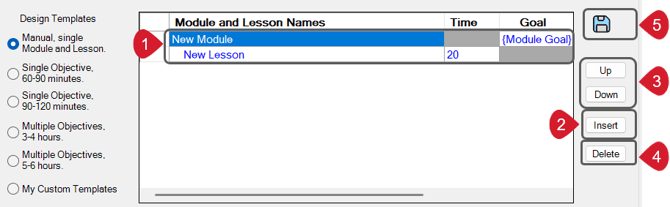
Begin by editing the included Module and Lesson names, Lesson time and Module Goal
-
What you enter here can be edited once you are in your guidebook
-
-
Then place your cursor in the first Lesson line and click Insert to add a new line
-
Type in your next Lesson or Module name
-
Module names are left justified
-
Indent Lesson names 3 or 4 spaces
-
Enter Lesson times in minutes only
-
Module goals are concise statements of what the participants will learn in the module
-
-
Place your cursor in a Module or Lesson line and use the Up and Down buttons to reorder your entries as needed
-
Use Delete to remove a Module or Lesson entry
-
When you are done, click Save
|
📍TIP: After you Save You can open your saved custom template to continue working in it or to use it as the jumping off point for a new custom template |
✔️ To access your saved custom templateOpen or create a guidebook with the same Collection that was in use when you saved your custom template |
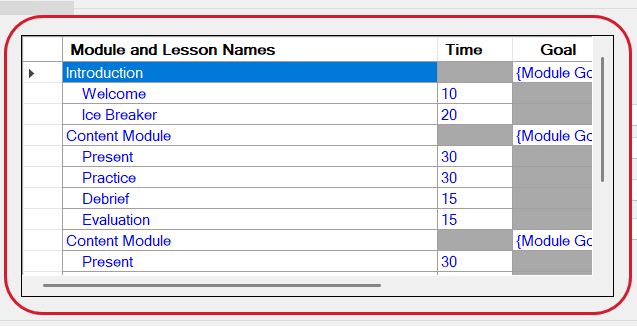
If you choose to use one of the longer included template outlines
-
Type over the default text with your module and lesson names, times and goals
-
Use the Up, Down, Insert, Delete functions as needed
-
Click Save when done
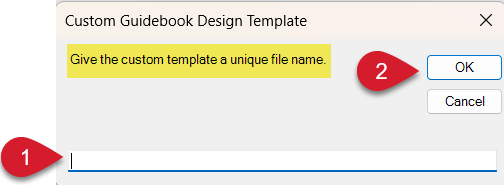
After you click Save, you will be prompted to give your custom Guidebook Template a unique name
-
Type in the name
-
Click OK
-
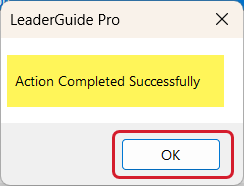
You will now see a message telling you that your new template has been saved
-
Click OK
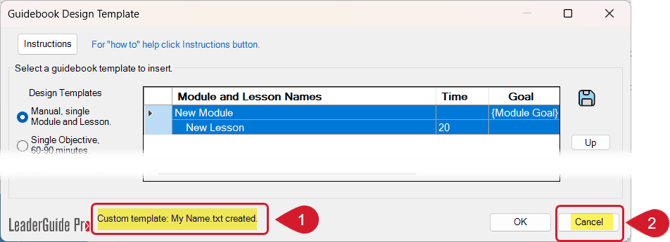
The Guidebook Design Template wizard will still be showing on your screen
-
In the bottom left side of the wizard, you will see:
-
Custom template: [The name you typed in] created.
-
-
Click Cancel to close the wizard
|
If you click OK Your saved Template will be added to end of the open guidebook on your screen |
To access your custom template(s)
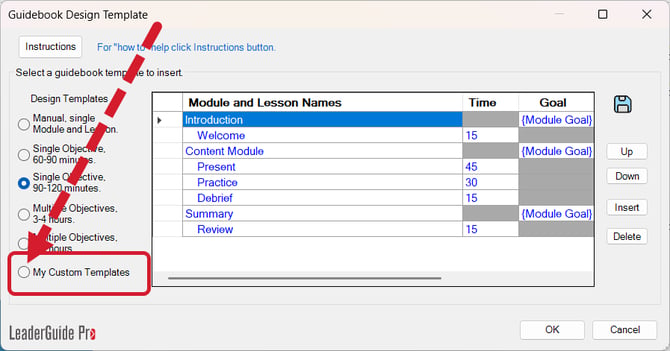
There are two ways to open a saved guidebook template
Open an existing guidebook |
Start a new guidebook |
|
|