Always Use the LeaderGuide Pro Ribbon

The ribbon is your key to success when building facilitator & participant guides.
The LGPro Ribbon is your User Interface.
Even though LeaderGuide Pro uses Word as its platform
You must use the LGPro ribbon when building facilitator & participant guides.
Good to Know
Hover
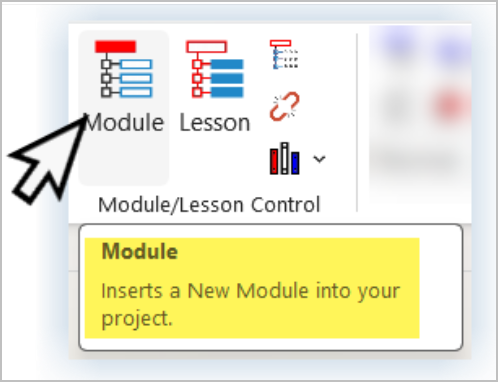
Hover your cursor over a button to see a Screen Tip with:
-
The button's name
-
What it does for you.
Not seeing your Screen Tips?
-
Click the File tab on Word's ribbon
-
Click Options > General
-
Under User interface options,
-
In the ScreenTip style box:
-
Select the option to "Show feature descriptions in ScreenTips"
-
Click OK
-
Cursor

Important:
Pay attention to where your cursor is BEFORE clicking a ribbon button.
-
The action you request will take place where your cursor is sitting
-
If you are inserting something, you want it to be added into the correct place.
Time

Allow time for the action you request to be completed
With LeaderGuide Pro you will do with one click what would otherwise require you to complete a series of manual actions.
-
Clicking a button kicks off a series of actions that run quickly in the background
-
So you need to let the process complete
-
LeaderGuide Pro automates the building of your documents to save you time and ensure consistency
Always use the ribbon buttons to ...

Select an option below:
- Start-Open-Attach
- Control Modules & Lessons
- Format Text & Tables
The Start Group
-
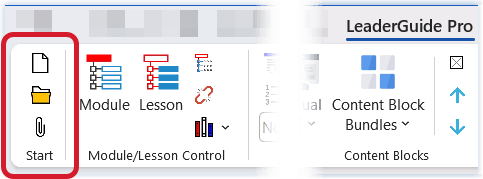
Start
-
New Facilitator Guides
-
New Participant Guides
-
New Content Parts (stand-alone Modules & Lessons)
-
-
Open
-
Existing Facilitator Guides
-
Existing Participant Guides
-
-
Attach
-
Enable LeaderGuide Pro in a Word document
-
Change the Collection in use in an existing Facilitator Guide or Participant Guide
-
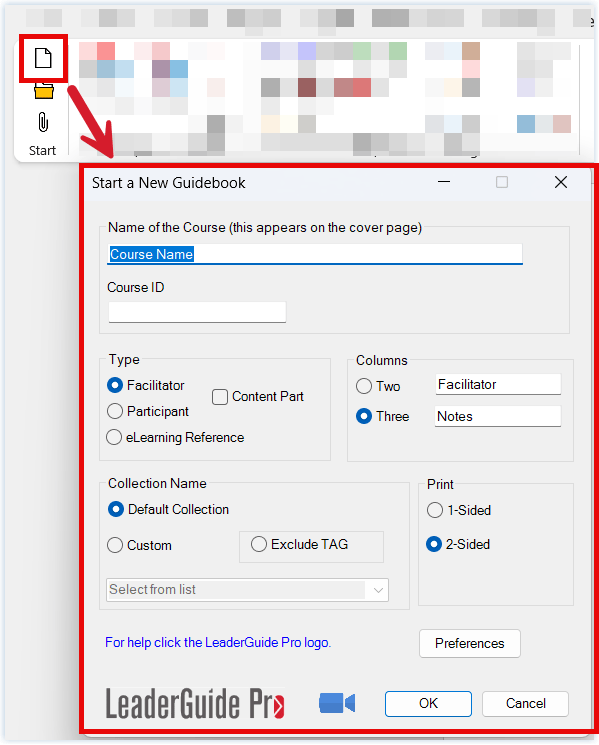
The New Button & the Start Wizard
-
Click New in the Start group to open the Start a New Guidebook wizard
-
Always start new Facilitator & Participant Guides this way
-
No more making a copy of an old document that's set up the way you need it
-
-
Also use this wizard to start stand-alone Modules and Lessons (Content Parts)
-
Then use Librarian when you are ready to integrate these Modules and Lessons into a full Facilitator or Participant Guide
-
-
This is also where you select the Collection that will be in use
-
The Collection determines the look of the Cover page, the Content Block Icons, the fonts and more
-
-
And, if you are building a Facilitator Guide for a short course and do not need the Training at a Glance, this is where you make the choice to exclude it
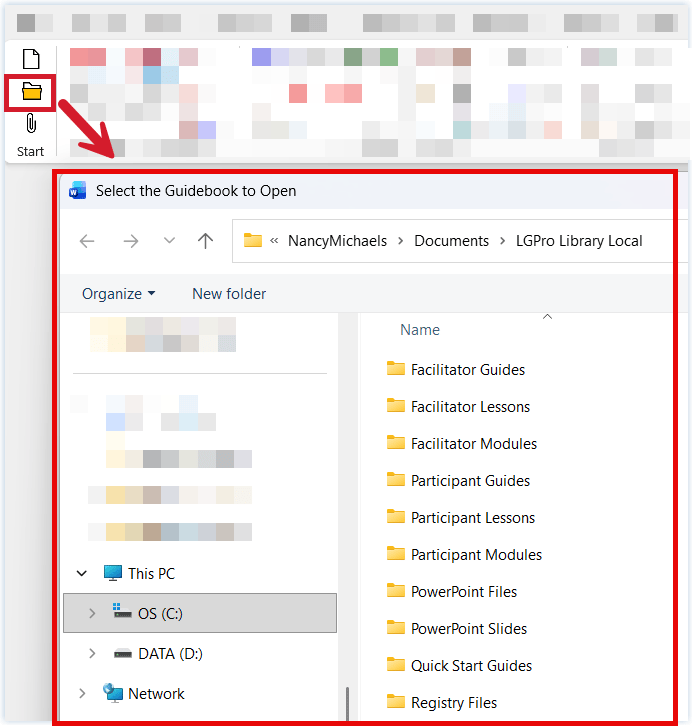
The Open Button & Your LGPro Local Library Folder
-
Click Open to be taken to your LGPro Local Library folder in Windows Explorer
-
This is the location LeaderGuide Pro defaults to when you use Word's Save function to save your work
-
If you have saved your work to a different location, simply navigate to it like you would for any other Word document
-
-
Opening your LeaderGuide Pro documents with the Open button ensures that the LeaderGuide Pro functionality is enabled
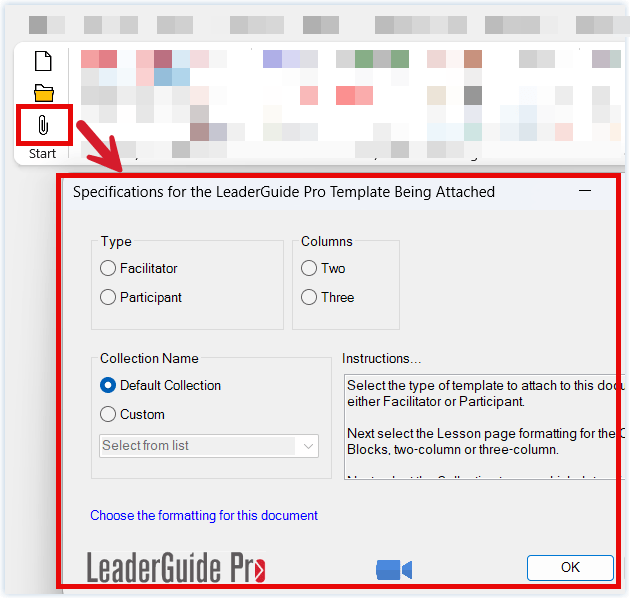
The Attach Button & the Attach Wizard
-
Click Attach to open the Attach wizard
-
Use this wizard to:
-
Enable the LeaderGuide Pro functionality in a Word document that is open on your screen
-
Change the Collection in use in a LeaderGuide Pro document that is open on your screen
-
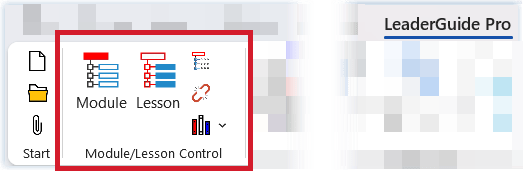
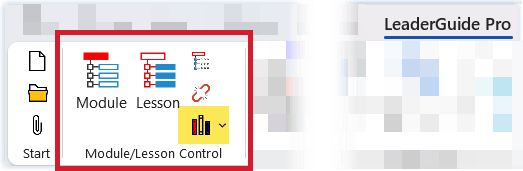
The Module/Lesson Control Group
Use the buttons in this group to:
-
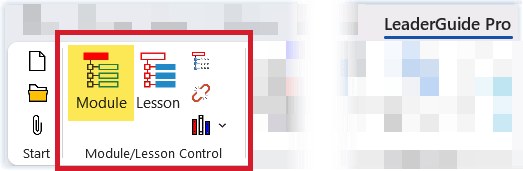
Insert a new Module into your Facilitator Guide or Participant Guide.
-
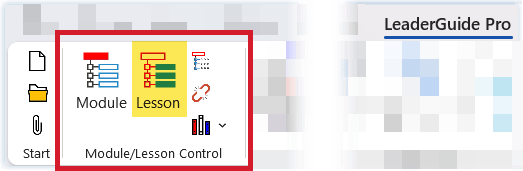
Insert a new Lesson into your Facilitator Guide or Participant Guide.
-
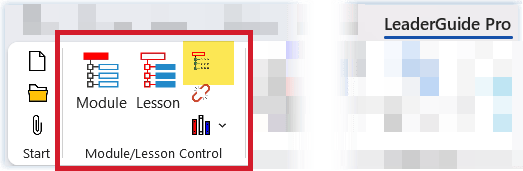
Continue a Lesson on the next page.
-
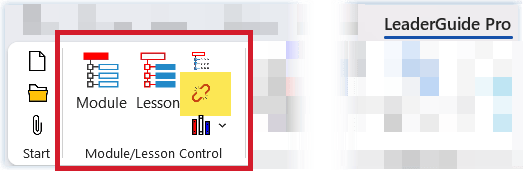
Insert a Break into a Module.
-
Access Librarian
Insert a New Module
-
Click the Module button to insert a new Module into your Facilitator Guide or Participant Guide.
-
Inserting a Module also automatically inserts:
-
a Section break at the end of the previous Lesson
-
a Page break at the end of the new Module page
-
a new Lesson.
-
-
Cursor placement is important when using this button.
-
Place your cursor at the logical spot where you want your new Module to sit.
-
This is usually at the end of a Lesson.
-
Insert a New Lesson
-
Click the Lesson button to insert a new Lesson into your Facilitator Guide or Participant Guide.
-
Inserting a Lesson also automatically inserts:
-
a Page break at the end of the previous Lesson
-
a Lesson Time Block at the top of the new Lesson page.
-
-
Cursor placement is important when using this button.
-
Place your cursor at the logical spot where you want your new Lesson to sit.
-
This is usually at the end of a previous Lesson.
-
-
If you want to break up a long lesson:
-
Place your cursor in the Content block you want to use start the new Lesson.
-
Continue a Lesson
-
Click the Continue button to insert a Page break on a Lesson page and move the rest of the Lesson content over to the next page.
-
Continuing a Lesson also automatically inserts:
-
a "Lesson. con't." heading at the top of the subsequent Lesson pages.
-
-
Cursor placement is important when using this button.
-
Place your cursor in the Content Block you want to move to the next page.
-
-
Be judicious about using this button:
-
It's best to wait to use this button until after all of your content is in place.
-
Otherwise, because of the way the Lesson pages automatically flow as you add content, you could end up having to go back and delete page breaks that have shifted in ways that don't make sense.
-
Insert a Break
-
Click the Break button to insert a Break in the training delivery.
-
A break can be inserted at three different levels:
-
Module level break that will appear in the Table of Contents & the Training at a Glance.
-
Lesson level break that will appear in the Table of Contents.
-
Content Block level break that will appear in the Table of Contents, indented below the Lesson it is in.
-
-
The visibility of the Break is usually tied to the length of time the break requires.
-
A one hour Lunch Break should be a Module level break
-
A 15 minute Coffee Break should be a Lesson level break
-
A 5 minute bio break should be a Content Block level break.
-
Access Librarian
Click the Librarian button to open a drop-down menu that lists the Librarian functions, including:
-
Archive Modules & Lessons to save them as stand-alone documents that are easy to work in and easy to repurpose.
-
Insert Archive Modules & Lessons to integrate them back into a full Facilitator Guide or Participant Guide.
-
Reorder Modules & Lessons to easily shift content around within an open document on your screen.
-
Delete Modules & Lessons to easily remove content and maintain the structural integrity of the document.
-
Add an Appendix to the end of a Facilitator Guide or Participant Guide.
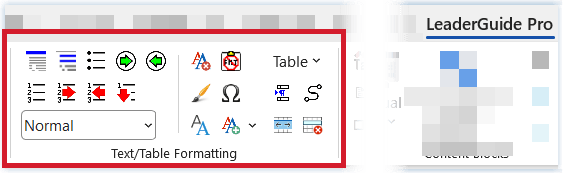
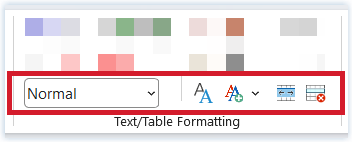
The Text/Table Formatting Group
-
LeaderGuide Pro automatically applies formatting for you.
-
Use the buttons in this group to modify the formatting.
-
Hover your cursor over a button to see a screen tip telling you what it does for you.
-
Do NOT use Word to perform the tasks these buttons do for you.
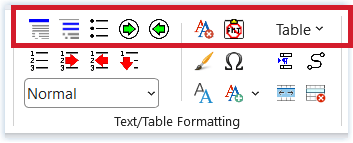
The first line of buttons in the Text/Table Formatting Group
Select text or a paragraph mark and use these buttons to:
-
Apply LGP Title - a bold headline font
-
Apply LGP Text - a regular body font
-
Apply Bullets - 9 levels available
-
Demote text, bullets & numbers
-
Promote text, bullets & numbers
-
Clear a style
-
Paste in content without it's source formatting - it will assume the formatting of the spot you are pasting into
- Insert a variety of formatted tables and nested tables
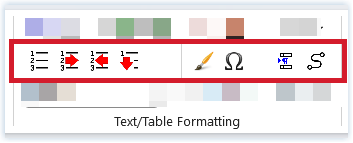
The second line of Text/Table Formatting Buttons
Select text or a paragraph mark and use these buttons to:
-
Apply Numbers - 9 levels available
-
Demote numbers - 9 levels available
-
Promote numbers - 9 levels available
-
Restart numbering at 1
-
Insert a single line for the Instructor or participant to write on
-
Insert a Correct Answer text field
-
Break the table on a Lesson page
-
Flow a Content Block (table row) across pages
The third line of Text/Table Formatting Buttons
Select text or a paragraph mark and use these buttons to:
-
Identify the style your cursor is sitting in
-
Open Word's Styles pane
-
Apply custom styles
-
Merge or Split table cells
-
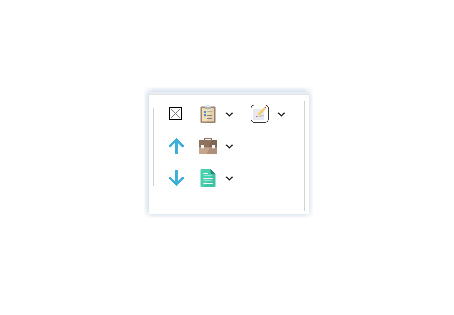
Delete Content Blocks (table rows)
Always use the Ribbon buttons to ...
Let the automation do the work for you.
Select an option below:
- Control the Document
- Add Content Blocks
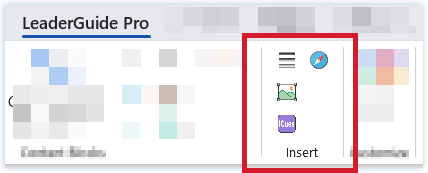
- Insert Pictures & More
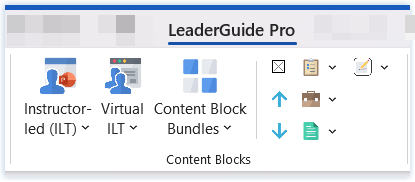
The Content Blocks Group
Use these to build your Lesson pages.
ALWAYS add Content Blocks from the ribbon.
-
Do NOT copy & paste Content Block icons over one another
-
Do NOT change the LGPro Content Block Style Names
The Content Block types in this group include:
-
Instructor-led (ILT)
-
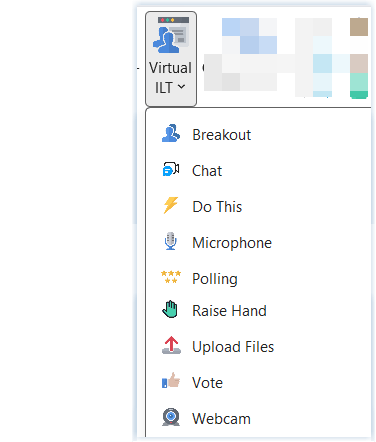
Virtual Instructor-led (VILT)
-
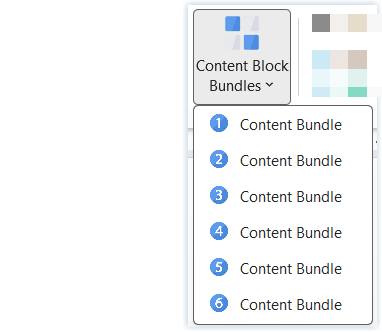
Bundles
-
Assessments
-
Case Studies
-
Handouts
-
Capture Notes
About Content Blocks
There are 58 Content Block types.
Each Content Block type has an LGPro Style Name and a Label.
-
The Content Block Style Names begin with "zLGPIcon" followed by the icon label, such as "Say" "Activity" "Chat"
-
A Graphic Cues page displays images of the icons in the Collection in use, along with their labels. This page is in the Introductory Materials section of a Facilitator Guide.
-
To see the LGPro Style Name of an icon, place your cursor next to it and look in the Styles box in the Text/Table Formatting group.
Each LGPro Collection includes all 58 Block types, with the same Style Names and labels.
-
The icons are built with different graphics, to give each Collection a unique looking set of icons/Content Blocks.
Content Blocks set up as either three- or two-column (cell) table rows.
-
Every Content Block begins with an icon, in the first column/cell of the Block.
-
Do not type in, delete or alter the first column/cell of a Content Block.
-
Cells/columns two & three are yours to use as needed for text and images.
Use the Text/Table Formatting group buttons to edit the pre-set format Content Blocks.
-
Both cells 2 & 3 are formatted to begin with a Headline in LGP Title style, followed by the LGP Text body font style.
-
Use the Bullet & Number options on the LGPro ribbon to add bulleted and numbered lists.
-
Use the Table option in the the Text/Table Formatting group to add special table types.
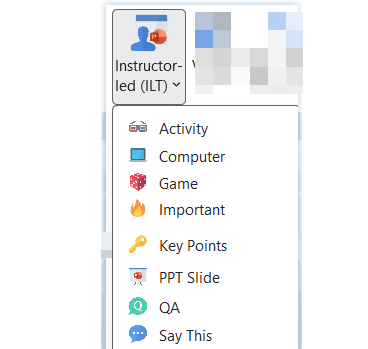
Instructor-led (ILT) Content Blocks
There are 24 blocks in this group, plus three custom block placeholders.
Content Blocks set up as either three- or two-column table rows.
Every Content Block begins with an icon.
Every icon has an LGPro Style Name.
Learn tips & tricks on how to use the all-new Content Slider module here. Have feedback on an awesome feature we should add to this module or discover a bug? Pop right over here to submit your ideas.
To change or add a style
You've got three options ...
-
Use the buttons in the Text/Table Formatting group
-
Click the Styles box and add the style you need from there
-
Use any custom styles you have added
NOTE:
-
Working with styles is a challenge for most of us.
-
That's why LeaderGuide Pro tries to handle this for you.
-
So, for those times when you need more, CONTACT US for assistance.
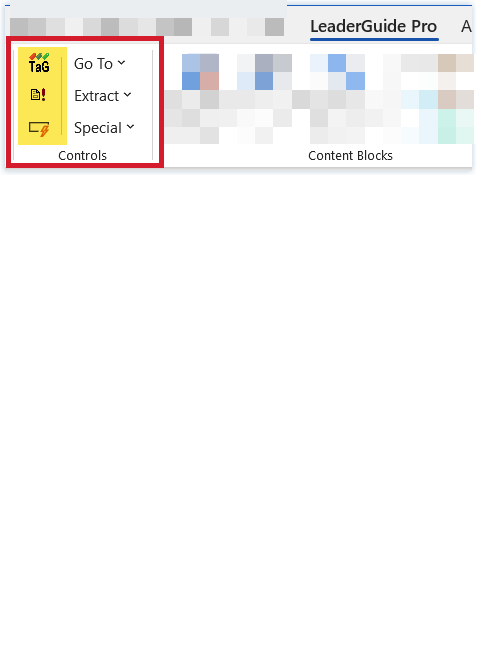
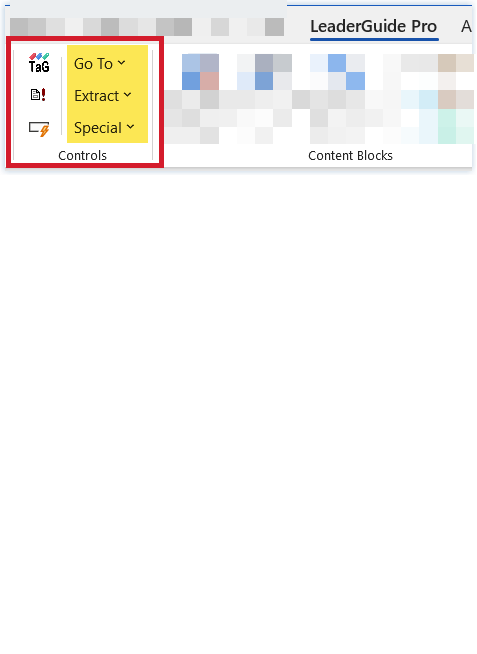
The Controls Group
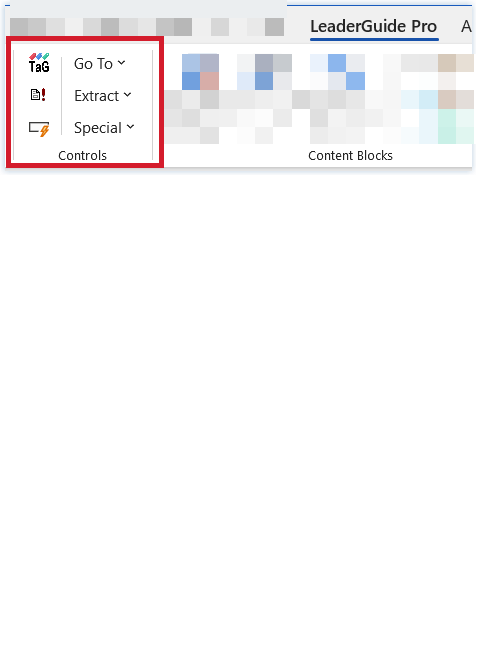
These buttons handle big important stuff for you.
They automate tasks that would otherwise require multiple steps and advanced knowledge.
And they save you a lot of time and a few headaches as they manage these things for you:
-
Training at a Glance
-
Update All Fields
-
AutoCorrect
-
Go To
-
Extract
-
Special
The Controls Group Column 1
-
Training at a Glance - Regenerate the Training at a Glance to update it with new Modules after you add them.
-
Update All Fields - Update all of the text fields in your document as you make changes in the source locations. For example:
-
-
Update the Table of Contents after adding a new Module or Lesson
-
Update the Course Name on the Acknowledgements page, in the Getting Started section and in the footers after editing it on your cover page
-
Update slide numbers after deleting or adding slides.
-
-
-
AutoCorrect - Create text shortcuts that expand to your frequently used word and phrases as you type them in. For example:
-
-
=ssl expands to "Say something like"
-
=pts expands to "participants"
-
=lada expands to "Lead a discussion about"
-
-
The Controls Group Column 2
-
Go To:
-
Navigate to the Table of Contents, Training at a Glance, Next Module, Next Lesson, every Content Block type.
-
-
Extract:
-
A Participant Guide from a Facilitator Guide, or vice versa.
-
Case Studies, Handouts and Assessments
-
Timed Agendas
-
Audit Trail Data
-
-
Special:
-
Work with PowerPoint
-
Import Slides & Notes & Slide Text
-
Replace Imported Slides
-
Create Slides from Text in your Facilitator Guide
-
-
Work with Picture Images
-
Import into Picture Content Blocks
-
Replace imported pictures
-
Resize & Border Pictures
-
-
More
-
Control which Content Blocks display on your Graphic Cues page
-
Hide/Show Icons and Content Blocks
-
Sync Content Blocks between companion Facilitator Guides & Participant Guides
-
-
Getting Comfortable with the LGPro Styles
Recognizing and understanding how to work with the LGPro Styles you will be working with the most
-
This is the Course Name you added when you started your Facilitator Guide
-
It appears on your Cover page in the Program Name space
-
Program Name has special coding to make it repeat at certain places in your guidebook
-
To change the Program Name (course Name), type over what's there on your Cover page without changing the font or the style
-
These are non-printing
-
You only see them when working in your document with Word's formatting marks turned on
-
DO NOT DELETE the Section Breaks and red text
-
These are controlled by LeaderGuide Pro
-
They pick up information from other key spots in your documents
-
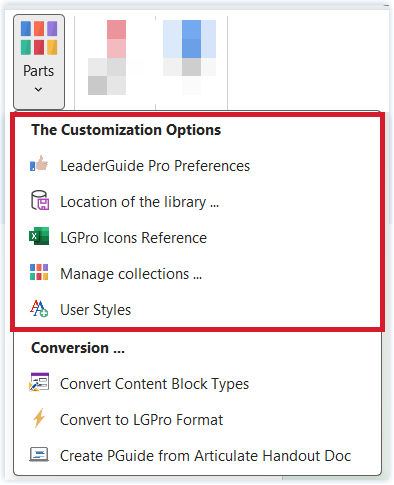
If you want to change these, use the LGPro customization tools
-
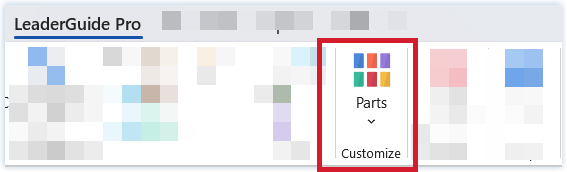
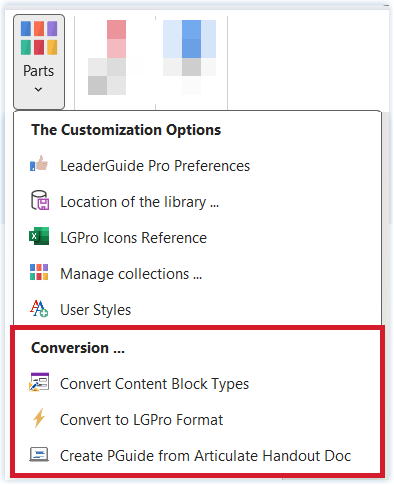
Click Parts > Manage Collections
-
-
Every LeaderGuide Pro Facilitator Guide begins with this section.
-
It contains information to help your instructors understand:
-
how the facilitator guide is set up and
-
what they need to know and do to prepare for the live delivery
-
-
Do NOT manually delete this section
-
To remove this section:
-
Create a CUSTOM Collection
-
Click Parts > Manage Collections
-
-
-
To edit the content in this section you can either:
-
Manually edit the text, like any other Word document
-
Or create a Custom Collection so that you only have to make your edits once
-
-
Contact us for assistance with customizing.
-
This page ONLY appears in a Facilitator Guide
-
It is a table that automatically builds for you
-
It draws from the Module pages in your guidebook
-
To edit the content on this page:
-
Go to the corresponding Module page and make the edits there.
-
Then click Update All Fields on the LGPro ribbon
-
-
To REMOVE the this page:
-
Click Exclude TAG when starting your new Facilitator Guide
-
Or Extract a new Facilitator Guide from the existing one and click Exclude TAG when starting your new Facilitator Guide
-
-
Do NOT
-
Type on this page
-
Delete the Section Break and non-printing red text at the end of this page
-
Manually delete this page
-
-
Only appear in Facilitator Guides
-
Provide a concise synopsis of what the instructor will be doing and for how long - for just this discrete chunk of the training
-
Feed the Training at a Glance Page
-
The Module Name at the top of the page appears in the page headers for this just this module and in the Table of Contents and in the Training at a Glance
-
To edit the Module Name simply type over whatever is currently on the page - Do NOT change the font or the style
-
The Module Time is managed for you by LeaderGuide Pro based on the Lesson time
-
Work with this page as is - do not add more Content Blocks
-
Every Module has at least one Lesson
-
Lessons communicate the instructional content in an at-a-glance format
-
The Lesson Name at the top of the page appears in the Table of Contents, indented below the Module it is associated with
-
To edit the Lesson Name, type over the existing name on the first of the Lesson and then click Update All Fields
-
Lesson pages are built with Content Blocks that you add from the LeaderGuide Pro ribbon
-
Type your instructional content into the Content Blocks
-
Lesson pages will automatically flow over to subsequent pages as needed
-
The last Lesson in a Module always ends with a Transition Block tht is added by LeaderGuide Pro after you click the TAG button
-
The last Lesson in a your Facilitator Guide always ends with non-printing red text - do NOT delete
-
ALWAYS add Content Blocks from the LeaderGuide Pro ribbon
-
Content Blocks are table rows
-
Manage the Content Block rows from the Text-Table Formatting group
-
Use the Content Blocks to chunk your content
-
These are designed to maintain professional formatting.
-
And they provide an at-a-glance, easy-to-use layout.
-
Any time you see red text it is non-printing
-
It is there for a reason - Do NOT delete it
-
Word's formatting marks turn on when using LeaderGuide Pro
-
They help you maintain the professional formatting
-
Keep them on when working in your Facilitator Guide